 Version 1.0.0 · Laravel 13 · Flutter · Next.js
Foodifly documentation
Everything you need to install, configure and launch your food delivery platform: the admin panel and API, the customer, rider and restaurant apps, the restaurant portal and the customer website.
Read the sections in this order the first time: Requirements → Install the backend → After installing → the app or web section you need. The Known limitations section lists what is not included in this version.
Overview
Foodifly lets you run a food delivery marketplace. Customers order from restaurants, riders deliver, restaurants manage their menu and orders, and you run everything from one admin panel. All of the clients talk to the same Laravel backend (/api/v1) and receive live updates through Pusher and push notifications through Firebase.
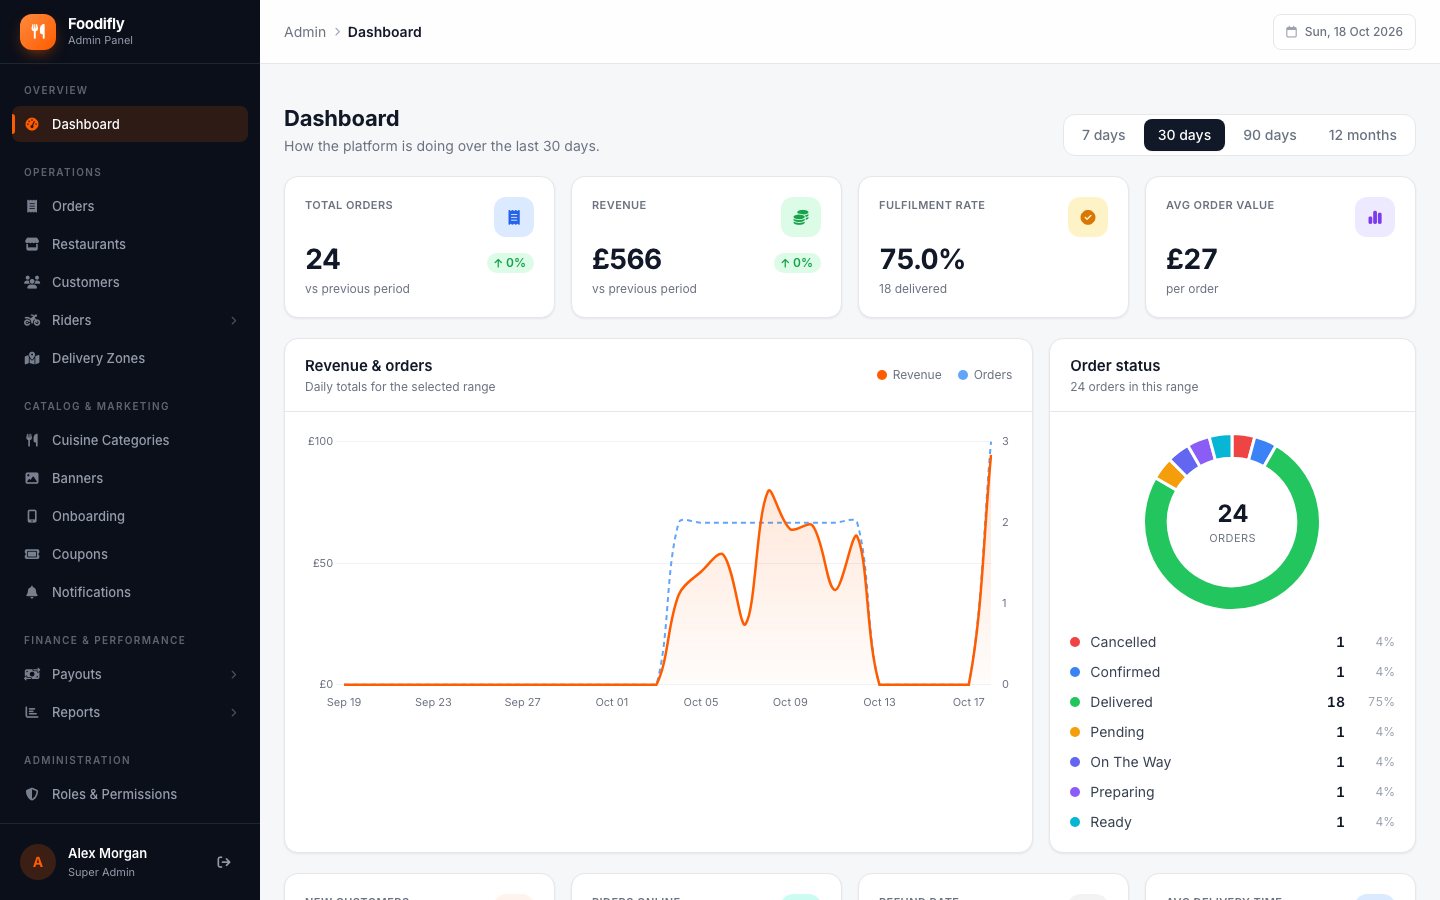
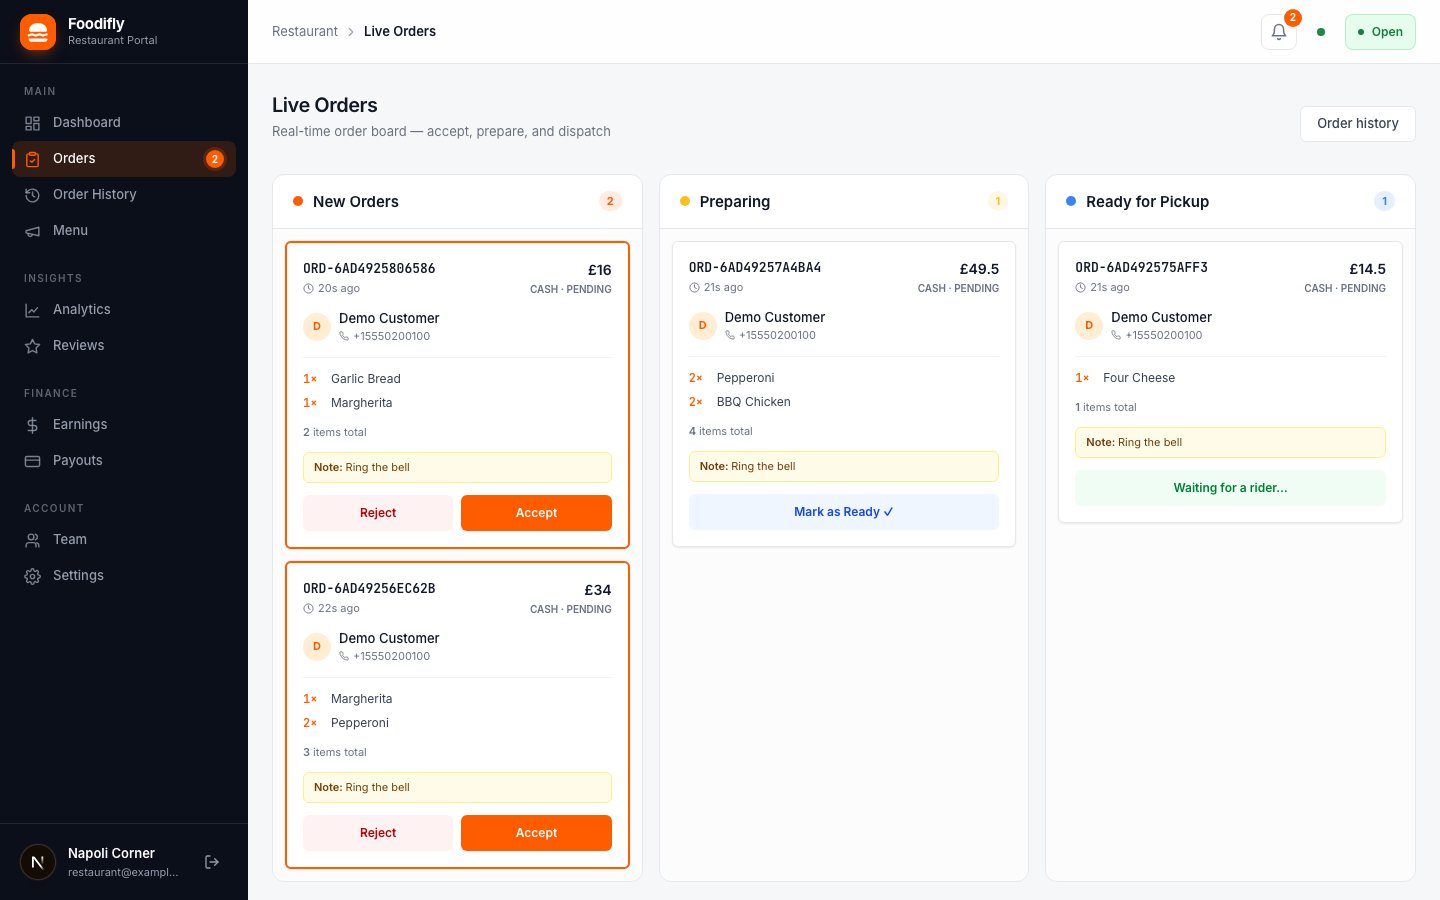
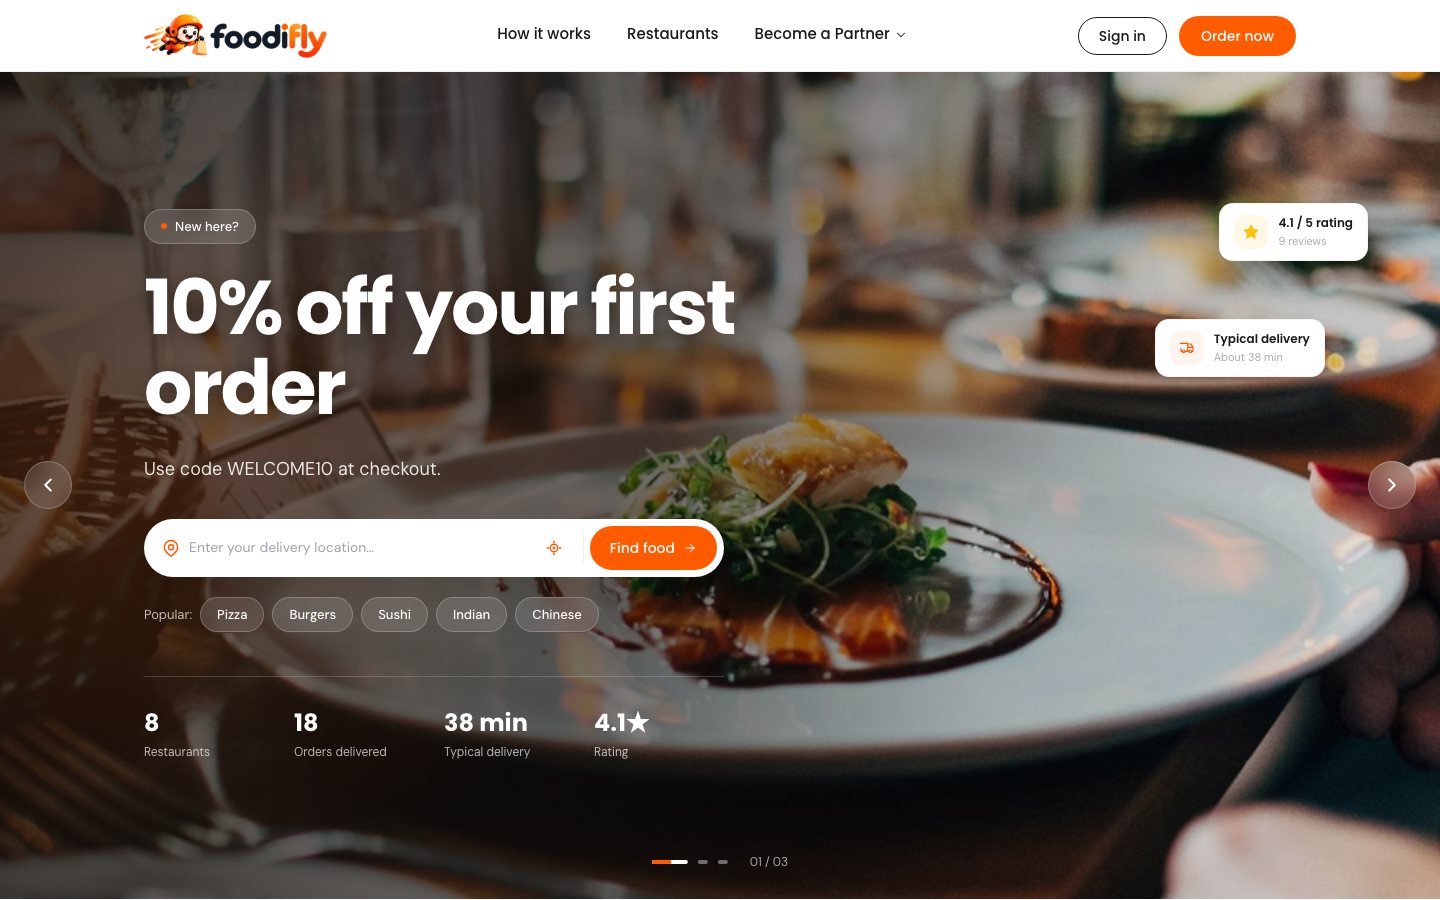
Feature highlights
Customers
Browse and search restaurants, cart, promo codes, saved addresses (map or search), rider tip, wallet, loyalty points, live order tracking, reorder, reviews and refund requests.
Riders
Sign-up with documents and approval, online/offline and breaks, live job offers with a countdown, pickup checklist, navigation, delivery code and proof photo, earnings and payout requests.
Restaurants
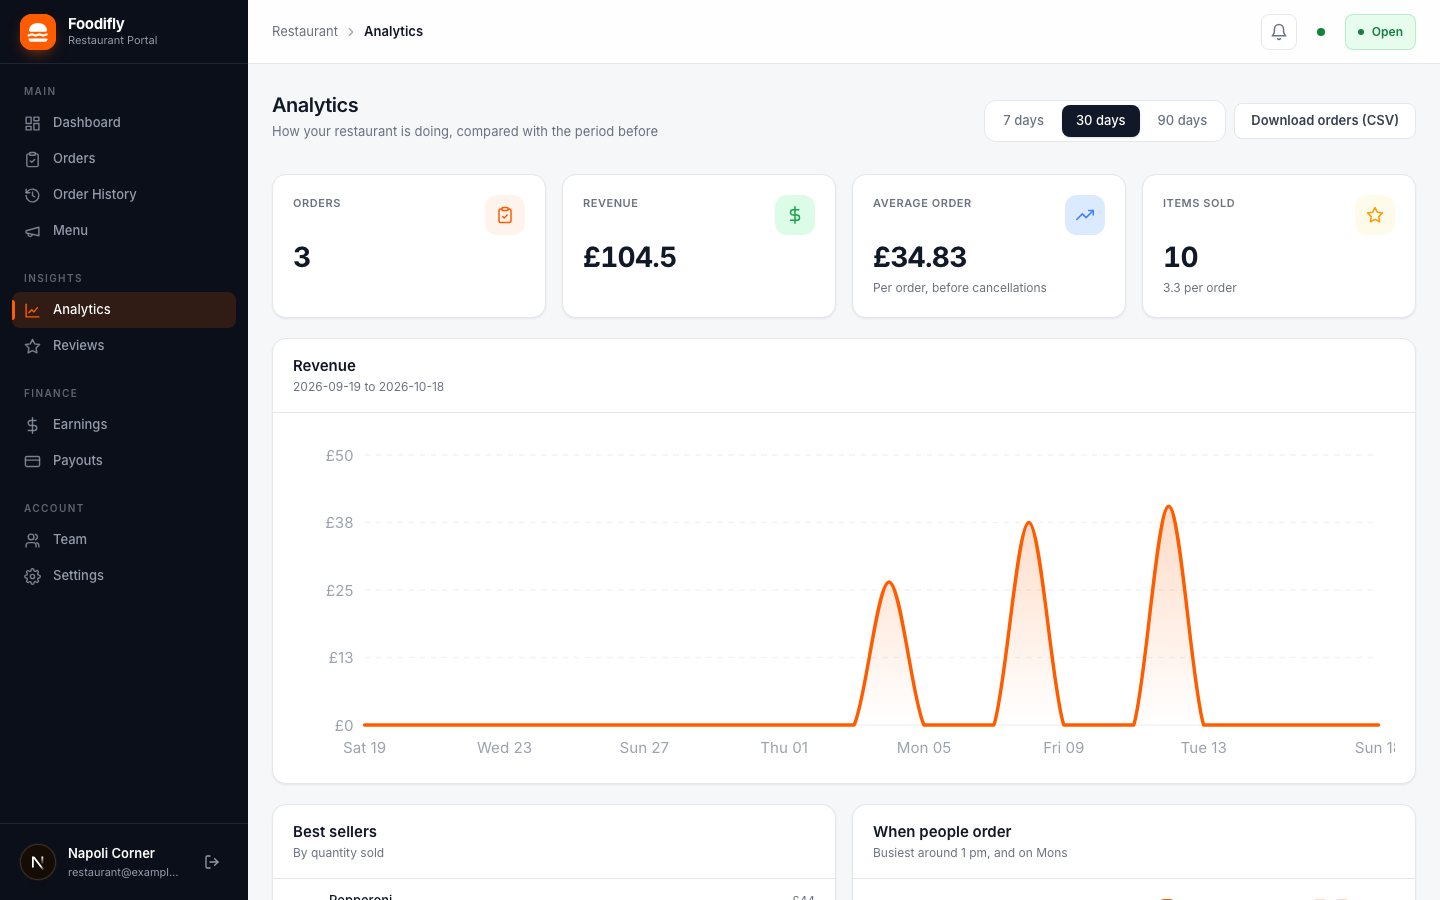
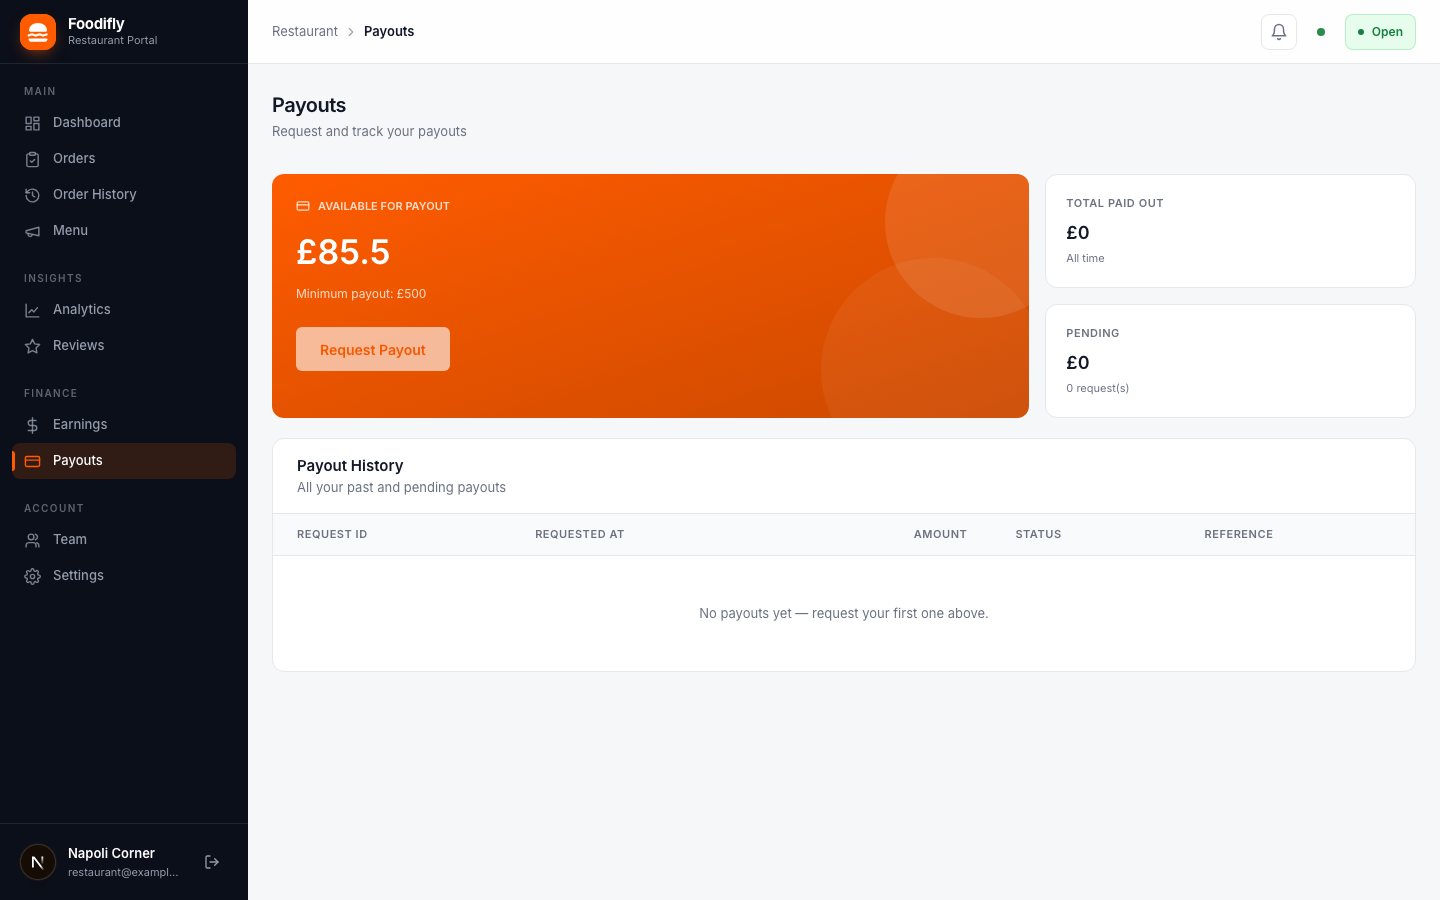
Apply online, a mobile app and a web portal with a live order board and alerts, menu and categories, opening hours and holidays, analytics, reviews, earnings, payouts and a team with roles.
You (admin)
Approve restaurants and riders, delivery zones and distance-based fees, commission rules, coupons, banners, payouts, reports, staff roles, and platform-wide settings.
Built to work in any country
Nothing in the code is tied to one country. Currency, timezone, support contacts, delivery fees, minimum order, tip amounts, wallet limits and loyalty rules are all set in the admin panel (Settings) and picked up by every app and website automatically.
What's in the package
The download contains six applications. Each lives in its own folder inside main/:
| Folder | What it is | Technology |
|---|---|---|
backend-and-admin-panel | The backend API and the admin panel (also contains the web installer and this documentation) | Laravel 13, PHP 8.4, MySQL |
customer-app | The customer mobile app (Android and iOS) | Flutter |
rider-app | The rider mobile app (Android and iOS) | Flutter |
restaurant-app | The restaurant mobile app for owners and staff: live orders and dish availability (Android and iOS) | Flutter |
restaurant-portal | The restaurant owner web portal | Next.js 16, React 19 |
customer-website | The customer website | Next.js 16, React |
The backend download does not contain vendor/ (the PHP packages) or public/build/ (the compiled admin styles). Marketplace rules do not allow those folders in a package, so you create them with two commands (see Install the backend, step 0). composer.json, composer.lock, package.json and package-lock.json are included for exactly that.
You do not need all six to start. The backend with its admin panel is the core. Add the clients you want to offer: for example the website and the restaurant portal only, with no mobile apps.
Requirements
Server (backend and admin panel)
| Requirement | Minimum | Recommended |
|---|---|---|
| PHP | 8.4 | 8.4 or newer |
| Database | MySQL 8.0 or MariaDB 10.6 | MySQL 8.0+ |
| Web server | Apache 2.4 or Nginx 1.18 | Nginx + PHP-FPM |
| Memory / disk | 512 MB / 500 MB free | 1 GB+ / 2 GB+ |
| HTTPS | Optional for development | Required in production (the portal's order alerts and the apps' payment pages need it) |
| Background jobs | Cron | Supervisor for the queue worker, plus cron for the scheduler |
PHP extensions
| Extension | Status | Why |
|---|---|---|
pdo_mysql | Required | Database |
mbstring, openssl, tokenizer, xml, ctype, json | Required | Laravel core |
fileinfo | Required | Upload validation |
bcmath | Required | Money calculations |
curl | Required | Payments, push notifications, maps |
intl | Required | Formatting |
gd or imagick | Required | Image processing |
zip | Recommended | Archives |
redis | Optional | Faster cache and queue on busy sites |
The web installer needs PHP's exec() function enabled because it runs php artisan for you. Some shared hosts disable it; if yours does, ask them to enable it or use the command-line install.
For the web clients
- Node.js 22 LTS (or 20.19 and newer) to build and run the restaurant portal and the customer website (Next.js 16).
- Composer 2 and Node.js 22 LTS (or 20.19 and newer) with npm are needed once, to create
vendor/andpublic/build/for the backend (step 0 of the install). Run them on the server over SSH, or on your own computer and upload the result.
Mobile app compatibility
| Platform | Minimum | Applies to |
|---|---|---|
| Android | Android 7.0 (API level 24) | Customer, rider and restaurant apps |
| iOS | iOS 14 | Customer, rider and restaurant apps |
Accounts you need (third-party services)
Foodifly depends on a few services run by other companies. You create and pay for your own accounts; nothing is shared with the author. Most have a free tier that is enough to start. See External services and outbound connections for exactly when each one is contacted.
| Service | Needed for | Cost |
|---|---|---|
| Firebase (Google) | Push notifications. The backend uses the kreait/laravel-firebase package and your project's service-account key. | Cloud Messaging is free; Google sets the quotas |
| Google Maps Platform | Maps, address search and the delivery route | Billing account required; Google gives a monthly credit |
| Pusher Channels | Live tracking and new-order alerts | Free plan, paid plans for more connections |
| Payment gateways | Only the ones you switch on | Each provider's own fees |
| Apple Developer / Google Play | Publishing the mobile apps | Annual / one-time store fees |
To build the mobile apps
- Flutter 3.41.9 (the version the apps were built and tested with).
- Android Studio with the Android SDK, and for iOS a Mac with Xcode and an Apple Developer account.
- A Firebase project (push notifications), a Google Maps API key (Android and iOS), and a Pusher Channels app (live updates). See the configuration sections.
Install the backend
You can install with the web installer (no command line needed) or from the command line. Both give the same result.
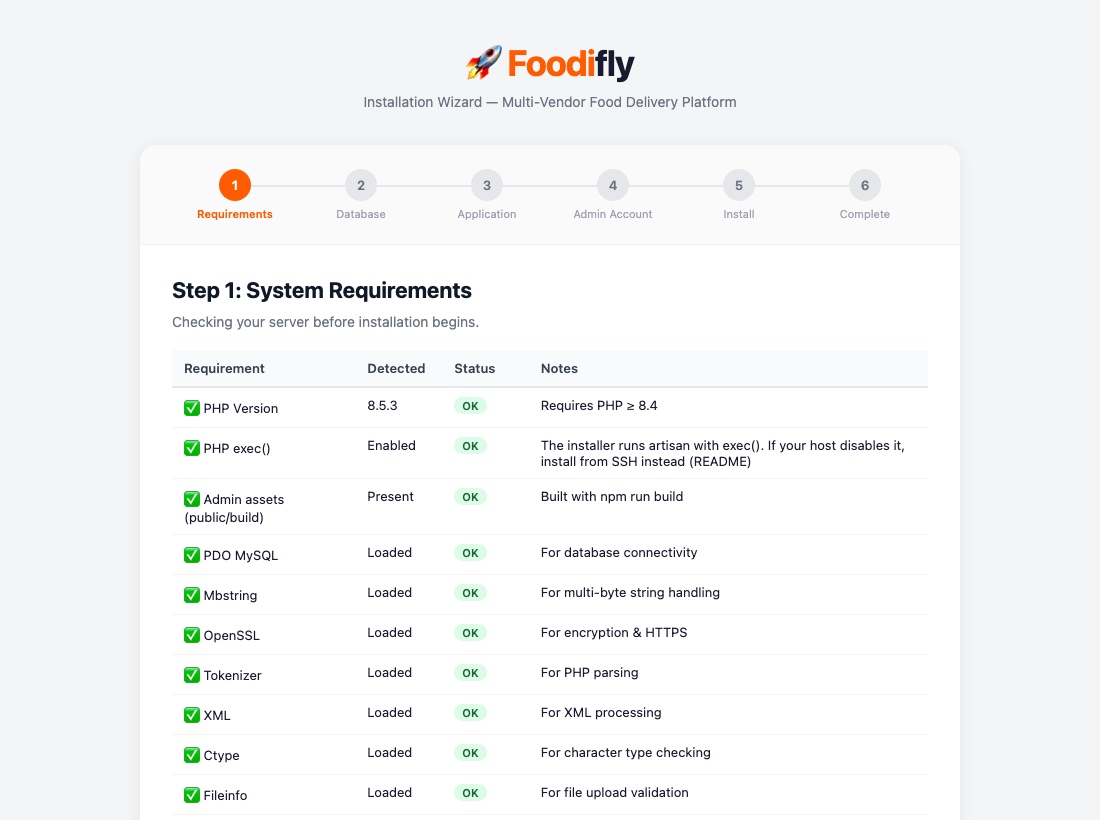
Step 0: Get the packages and build the admin styles (once)
In the backend folder, run these three commands:
cd backend-and-admin-panel
composer install --no-dev --optimize-autoloader
npm ci
npm run build- They create
vendor/(PHP packages) andpublic/build/(the admin panel's CSS and JS). Afternpm run buildyou can deletenode_modules/. - No SSH on your hosting? Run the commands on your own computer (Composer 2 and Node.js 22 LTS or 20.19+ installed), then upload the whole folder, including the new
vendor/andpublic/build/. - The web installer's first step checks both folders and tells you the command if one is missing.
Option A: Web installer
- Upload the files. Upload the contents of
backend-and-admin-panelto your server and point the domain's document root at itspublicfolder. Do step 0 first, so the folder you upload containsvendor/andpublic/build/. - Create an empty MySQL database and a user with access to it.
- Open
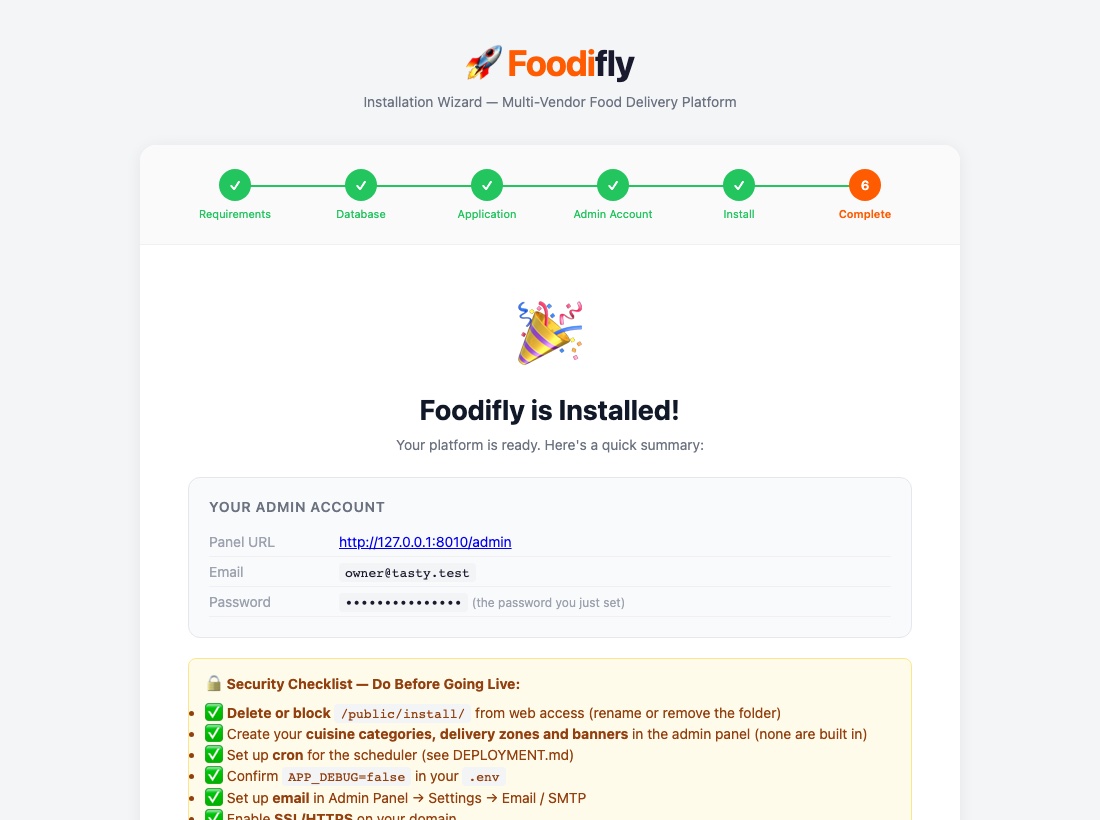
https://your-domain.com/install/and follow the steps (the last one is the finish page):
| Step | What it does |
|---|---|
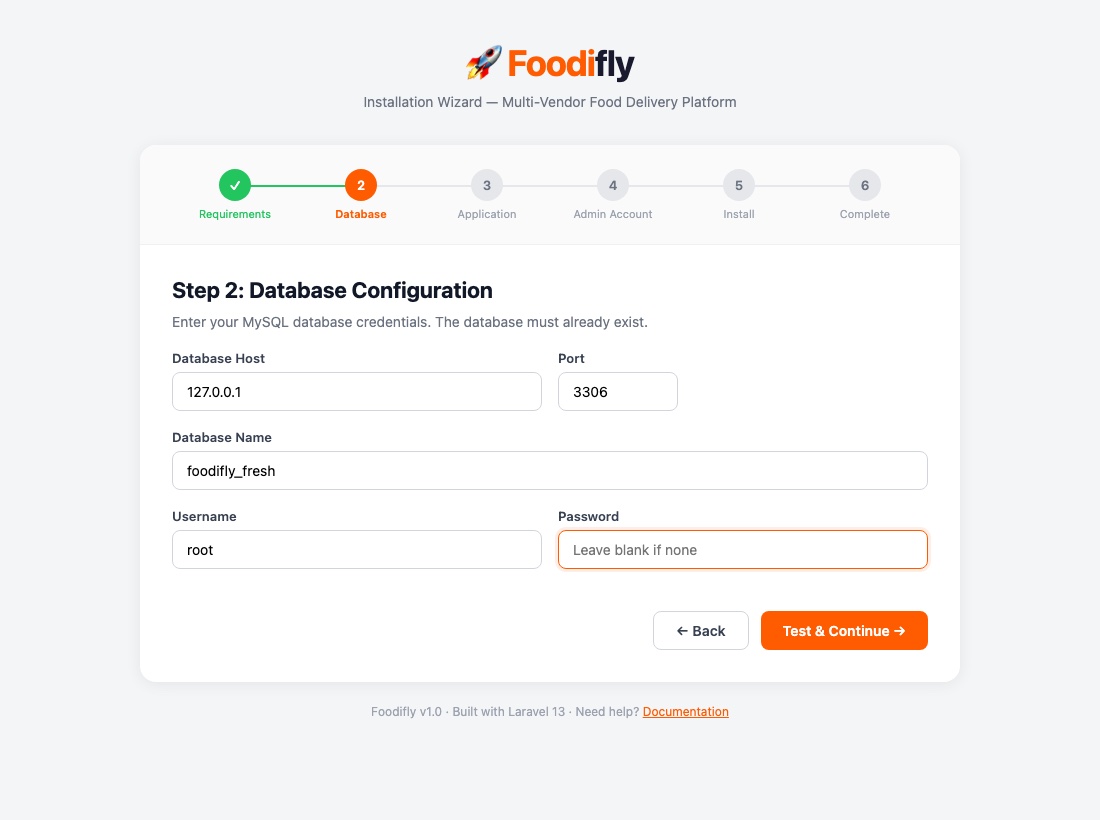
| 1. System requirements | Checks PHP 8.4, the extensions above, that exec() is enabled, that public/build and vendor exist, and that storage, bootstrap/cache and public are writable. |
| 2. Database | Host, port, database name, user and password. |
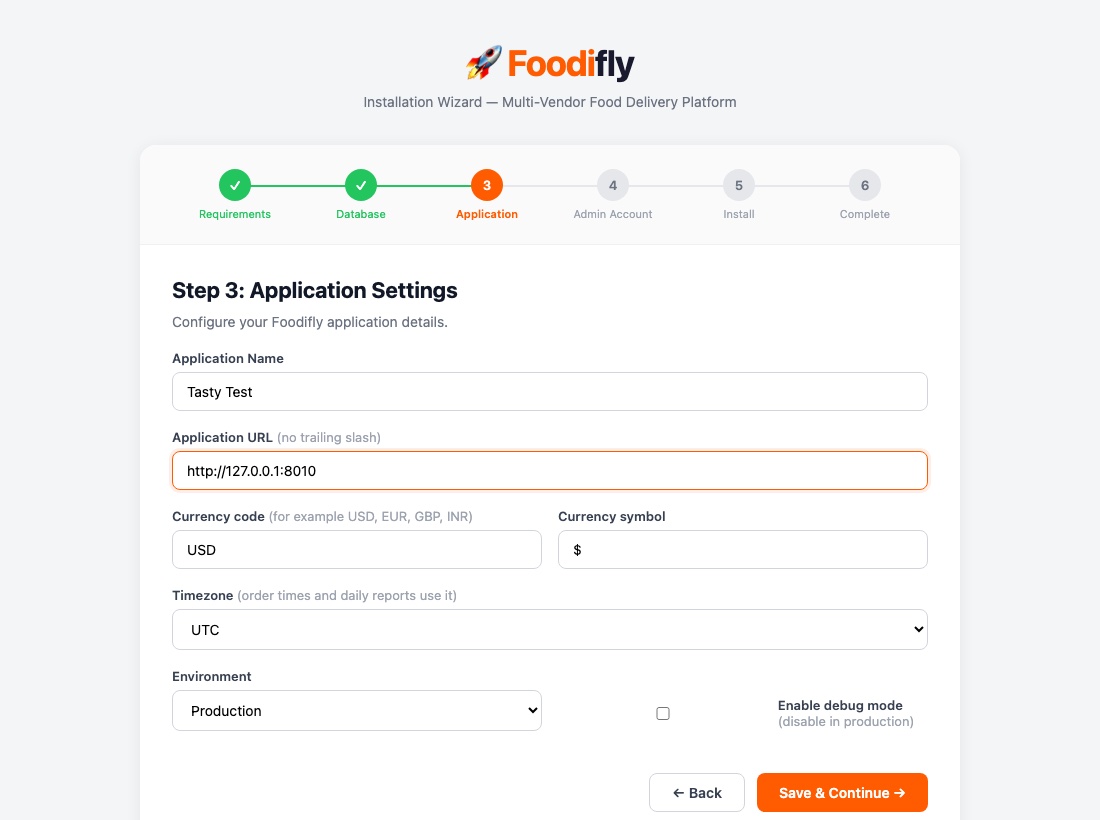
| 3. Application settings | App name, URL, environment, debug switch, currency code and symbol and timezone for your market. |
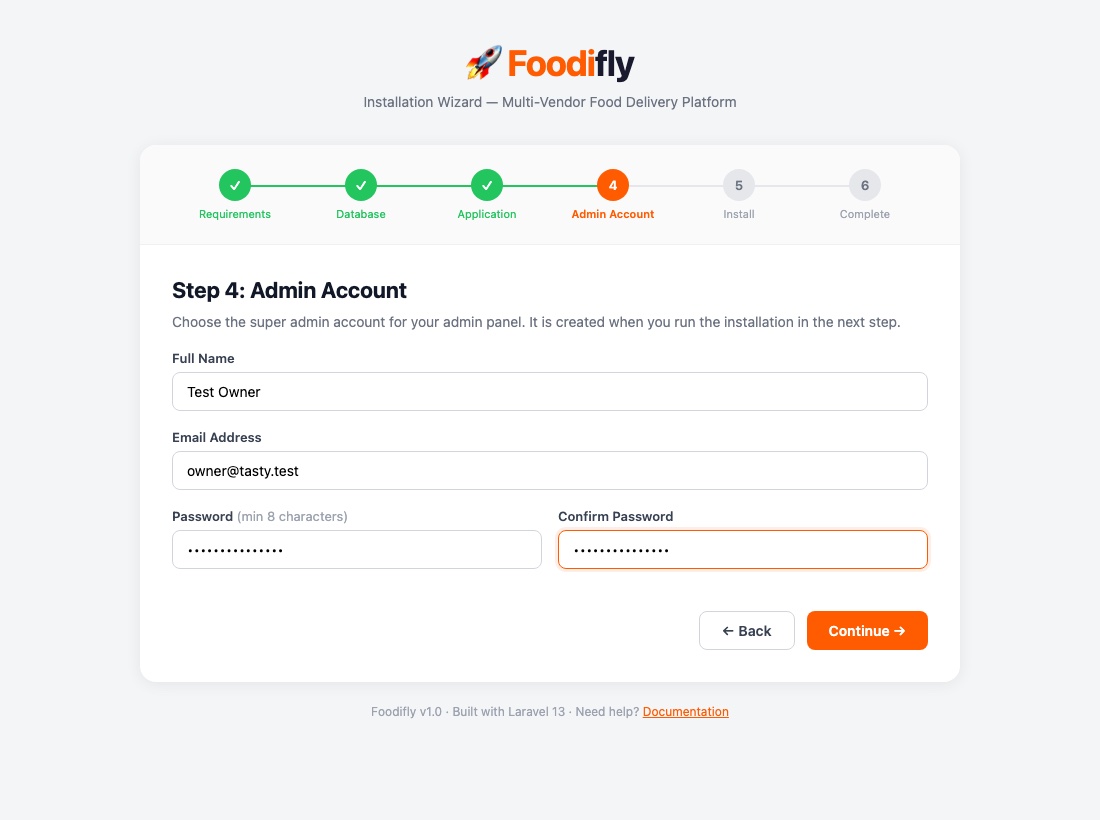
| 4. Admin account | Your name, email and password for the Super Admin. Nothing is written yet. |
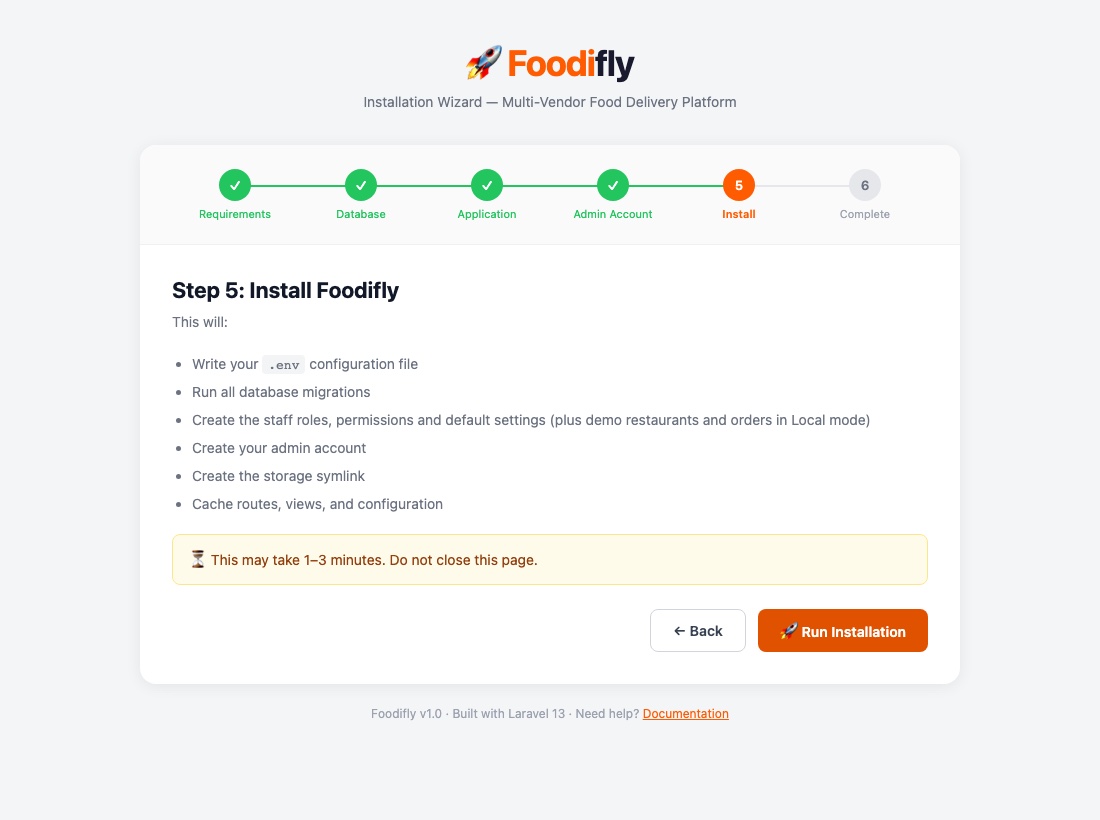
| 5. Install | Writes the .env file, generates the app key, runs the migrations, creates the default roles, permissions, settings and email templates, creates your Super Admin and then locks the installer. All of this happens in one run, so the site is never left installed without an admin. |
The installer refuses to run again on a site that is already configured. To re-run it deliberately, delete storage/installed.lock over FTP or SSH and open the page again.
Option B: Command line
# 1. Upload the code, create the database, then (step 0 above):
composer install --no-dev --optimize-autoloader
cp .env.example .env
php artisan key:generate

# 2. Edit .env. At minimum:
#    APP_ENV=production   APP_DEBUG=false   APP_URL=https://your-domain.com
#    DB_*                 QUEUE_CONNECTION=database
#    ADMIN_EMAIL / ADMIN_PASSWORD   (quote the password if it has spaces or #)

# 3. Install, migrate, build caches (also runs npm ci && npm run build)
bash scripts/deploy.sh

# 4. Create roles, permissions, default settings and your Super Admin (once)
php artisan db:seed --class=ProductionSeeder --force
Without an ADMIN_PASSWORD, a random one is generated and printed once. Locked out or need another Super Admin later? Run php artisan foodifly:create-admin --email=you@example.com.
Then sign in at https://your-domain.com/login.
After installing
Work through this list once. The admin panel shows whether the queue worker and scheduler are running under Settings → Firebase & Push.
- Start the queue worker. Push notifications, emails and payouts are queued; without a worker they are saved and never sent. With Supervisor:
sudo cp deploy/foodifly-worker.conf /etc/supervisor/conf.d/ sudo nano /etc/supervisor/conf.d/foodifly-worker.conf # set your path and web-server user sudo supervisorctl reread && sudo supervisorctl update sudo supervisorctl status foodifly-worker:* # should say RUNNING - Add the scheduler to cron (takes riders who closed the app offline after 30 minutes, and reports its heartbeat to the admin):
On shared hosting without Supervisor, add a second cron job instead:sudo crontab -u www-data -e # add the line from deploy/foodifly.cron, with your path: * * * * * cd /var/www/foodifly && php artisan schedule:run >> /dev/null 2>&1
Notifications then go out within about a minute instead of instantly.* * * * * cd /home/USER/foodifly && php artisan queue:work --stop-when-empty --max-time=55 >> /dev/null 2>&1 - Settings → General: check the currency, timezone, app name and logo, and fill in your support contacts, company name and address, and the Governing Law / Jurisdiction that your website's Terms of Service refer to.
- Settings → Firebase & Push: upload your Firebase service-account
.jsonand press Test connection. See Push notifications. - Settings → Maps & Location: add your Google Maps key and set the default map center. See Maps.
- Settings → Payment Gateways: enter the keys for the methods you use and switch them on. See Payment gateways.
- Realtime: create a Pusher Channels app and put its keys in
.env. See Realtime. - Create your content: a fresh install has none. Add Cuisines, Delivery Zones (and their delivery fees), Banners, and optionally Coupons. Restaurants and riders sign up themselves and you approve them.
- Run
bash scripts/deploy.shonce more: every check at the end should show ✓.
Demo data & accounts
To try the platform with sample data (8 restaurants with menus, 3 riders, 3 customers, 3 delivery zones, two weeks of orders, 2 coupons and 3 banners placed around your map center), use a development or staging copy:
php artisan migrate --seed          # or: php artisan db:seed --class=DemoSeeder
php artisan storage:link            # serves the demo photos
The demo photos are free Unsplash images downloaded once (about 4 MB). Without internet, or with SEED_DEMO_IMAGES=false, the demo is seeded without photos. The demo seeder refuses to run when APP_ENV=production, so seeding on a live server is safe. To remove the demo data and its photos again, without touching real data:
php artisan foodifly:demo-removeLive demo. The author runs a read-only demo of every part (nothing can be created, changed or deleted):
- Admin panel: foodifly-admin.appiflybd.com. The sign-in page lists the demo accounts with a Use this account button.
- Restaurant portal: foodifly-restaurant.appiflybd.com. Sign in as the restaurant below.
- Customer website: foodifly.appiflybd.com. Sign in as the customer below.
- Mobile apps: the customer, rider and restaurant apps use the same demo accounts (the Android demo APKs are linked on the item page).
- Try your own build against the demo: before building an app, set
API_BASE_URL=https://foodifly-admin.appiflybd.com/api/v1in itsassets/.env. You can sign in and browse right away; for maps, add your ownGOOGLE_MAPS_API_KEY.
Demo accounts (all use the password password)
ADMIN_PASSWORD)Your own admin account is the one you created in the installer (or ADMIN_EMAIL/ADMIN_PASSWORD from .env). The demo accounts above exist only after running the demo seeder.
Never leave demo accounts on a live site. Run php artisan foodifly:demo-remove before you open to the public.
Demo mode (a public preview site)
To run a live preview that anyone can try without being able to break it, turn on demo mode. Visitors can sign in to the admin panel, the apps, the website and the restaurant portal and look at everything, but nothing can be created, changed or deleted: every such request is refused with “This is a demo. Creating, changing and deleting data is turned off.” Signing in and out still works.
- Install a separate copy for the preview and load the demo data (above), with
SEED_DEMO_DATA=trueifAPP_ENV=production. - Turn demo mode on in
.env, with the admin account you created in the installer:DEMO_MODE=true DEMO_ADMIN_EMAIL=admin@your-demo-domain.com DEMO_ADMIN_PASSWORD=the-password-you-set - Apply it:
php artisan optimize. The admin sign-in page now shows the demo accounts (your Super Admin, plus the Manager and Support staff from the demo data) with a Use this account button that fills the form, and every admin page shows a “Demo” banner.
What demo mode restricts: every request that would create, change or delete something is refused with a "demo mode" message, for the admin panel, the API, the apps, the website and the portal. Reading is unrestricted. To turn it off, set DEMO_MODE=false (or remove the three DEMO_* lines) in .env and run php artisan optimize; the sign-in page then stops showing the demo accounts and everything is editable again.
Demo mode shows the Super Admin password on the sign-in page. Use it only on a preview copy with demo data, never on your real platform. The apps also receive demo_mode: true from /api/v1/app-config.
Admin panel: modules
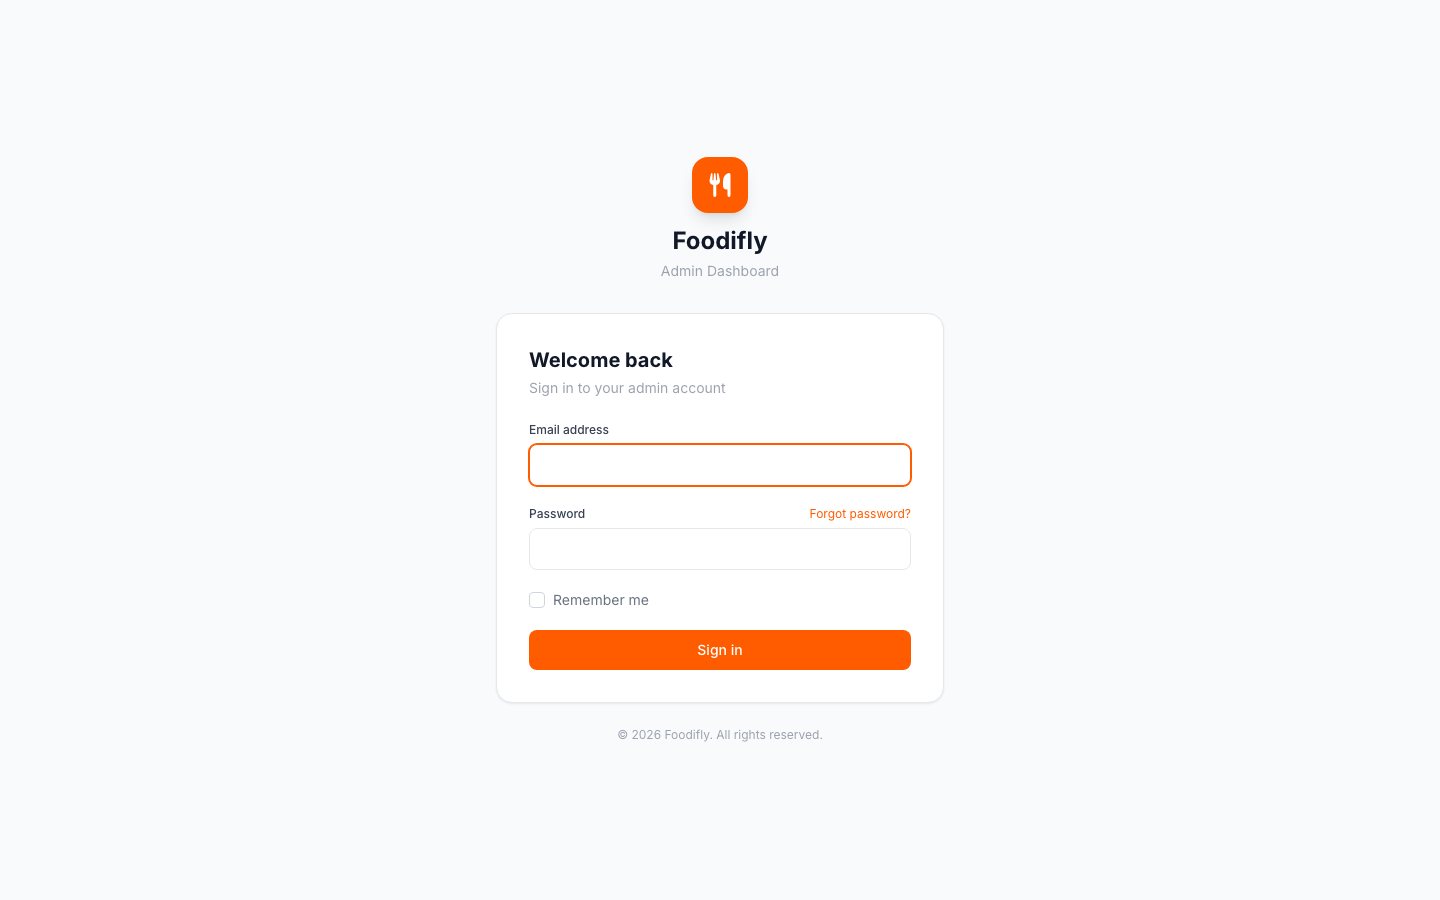
Sign in at https://your-domain.com/login. What each person sees depends on their role (see Staff & roles).
| Module | What you do there |
|---|---|
| Dashboard | Revenue, orders, customers and trends for the platform's business day. |
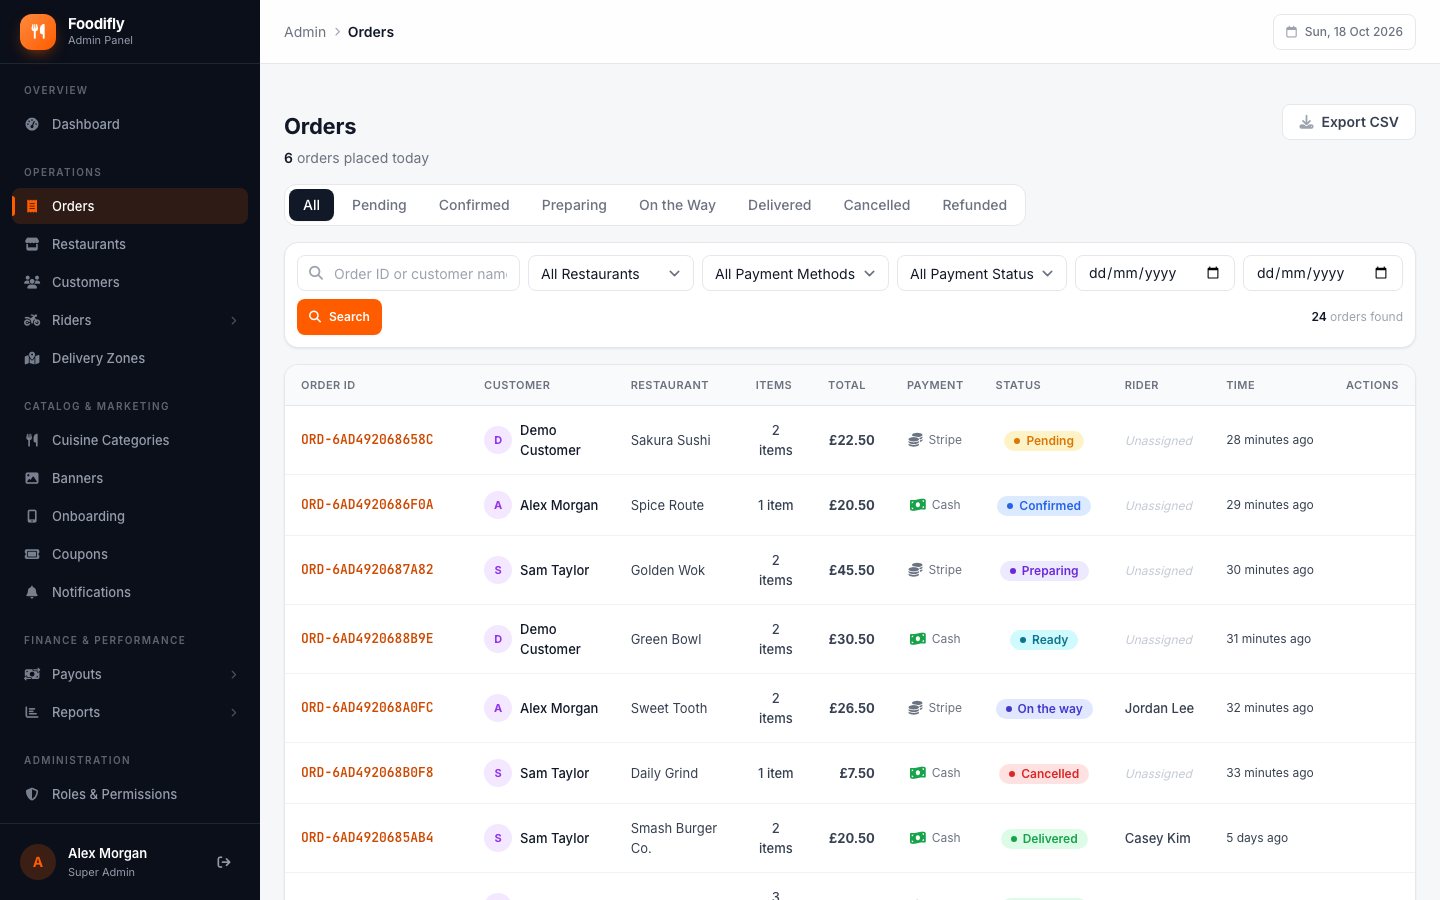
| Orders | Search and filter all orders, open an order's timeline, change its status, reassign the rider, refund, print the invoice, and export. |
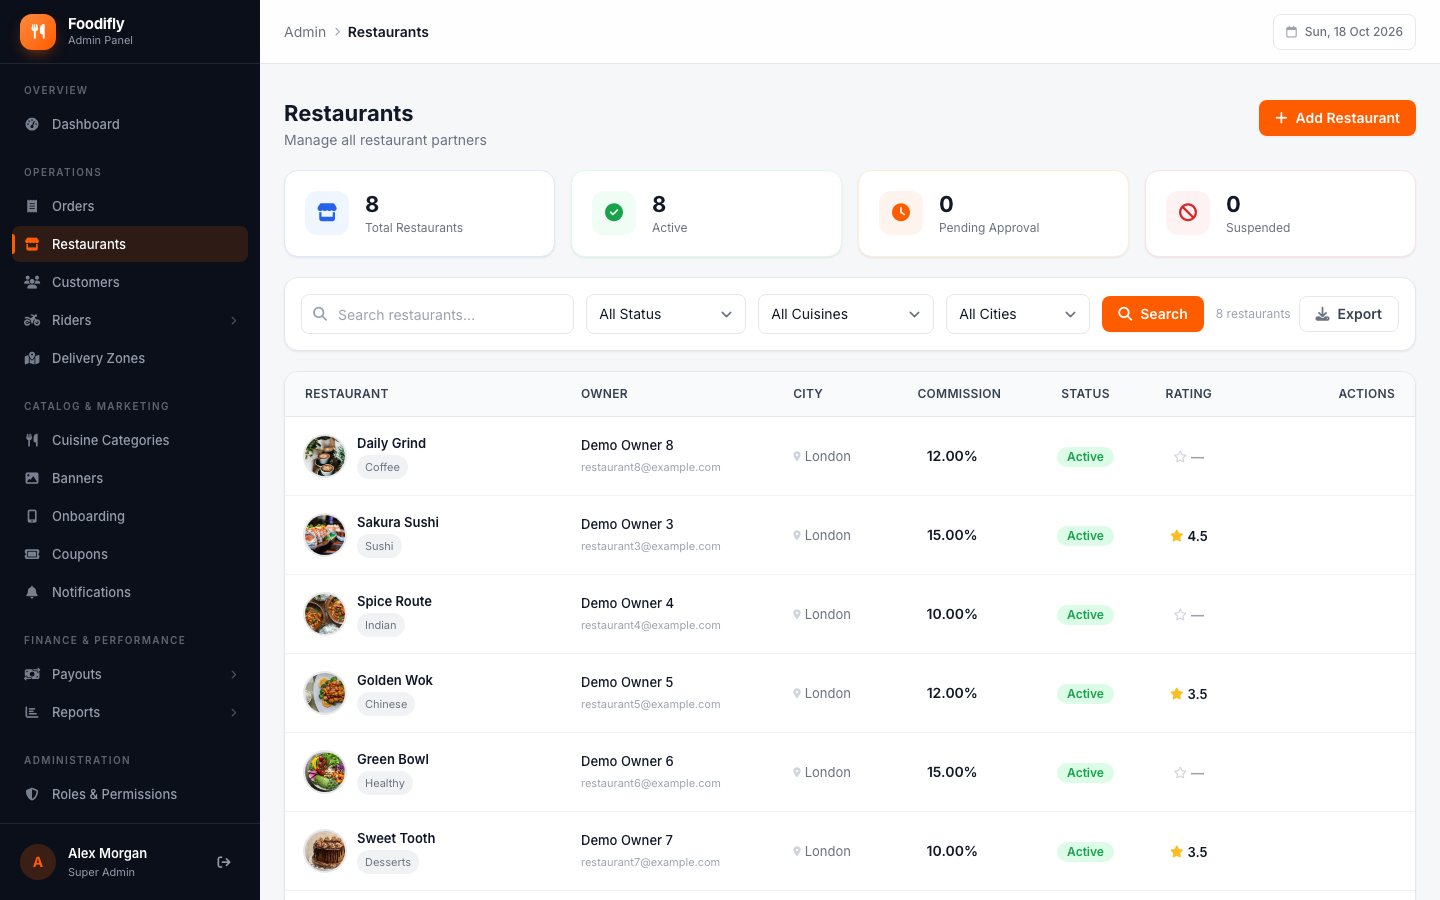
| Restaurants | Review sign-ups and approve them, edit details, activate or deactivate, and set each restaurant's commission (including per-restaurant commission rules). |
| Cuisines | The cuisine categories shown on the website and apps and offered at restaurant sign-up. |
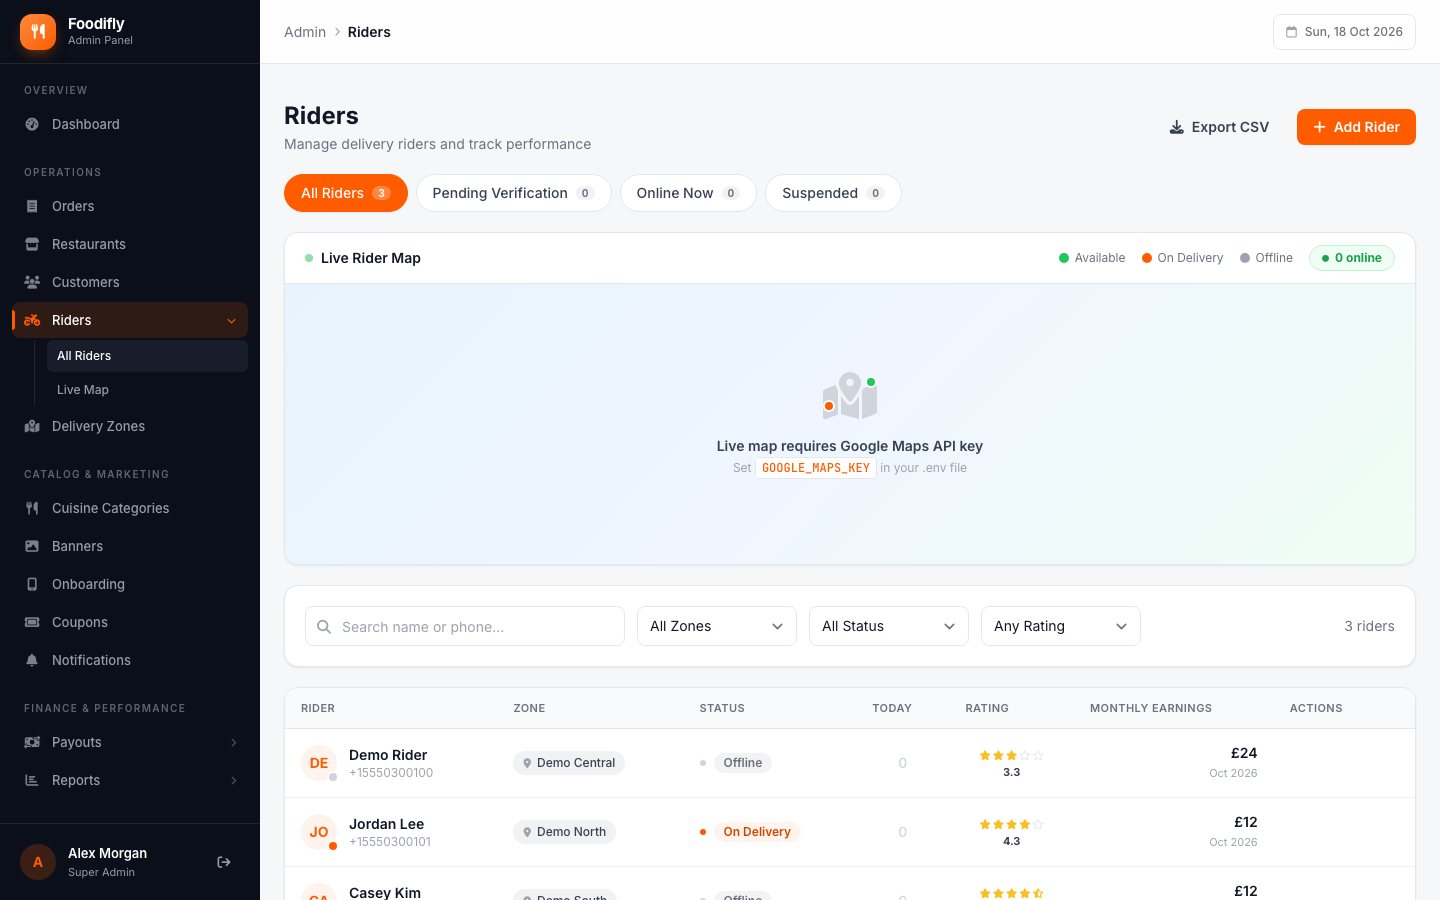
| Riders | Approve or reject riders after reviewing their documents, suspend or activate, assign a delivery zone, record cash handed in, view the live map, and export. |
| Customers | View customers, their wallet and loyalty points (with adjustments), ban or unban, and export. |
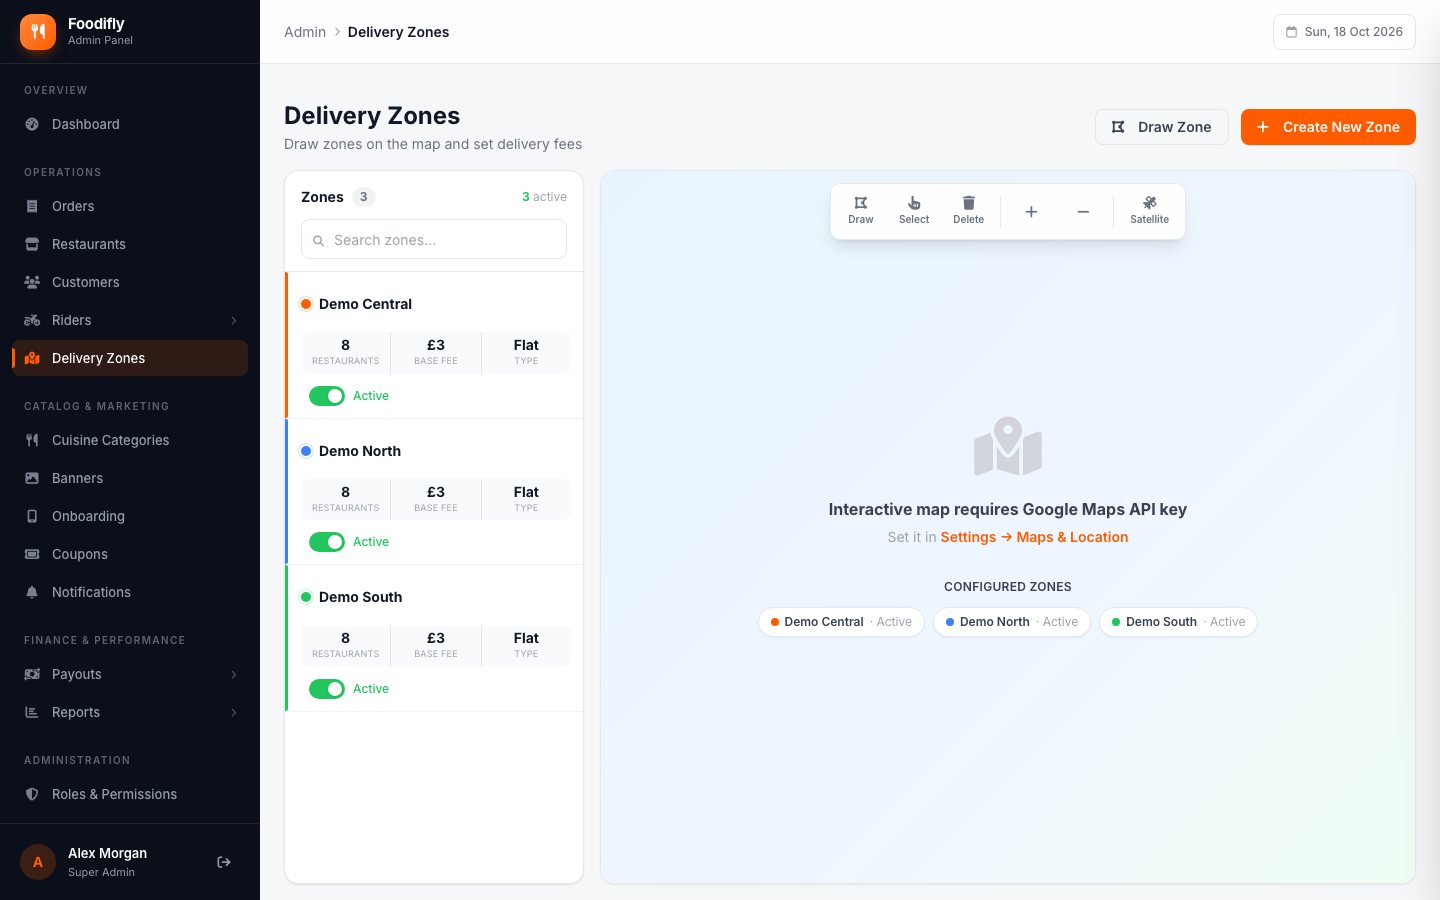
| Delivery Zones | Define zones and the delivery-fee tiers for each (the fee a customer pays depends on distance and zone). |
| Commission rules | Platform-wide commission rules, with a preview; restaurants can override with their own rules. |
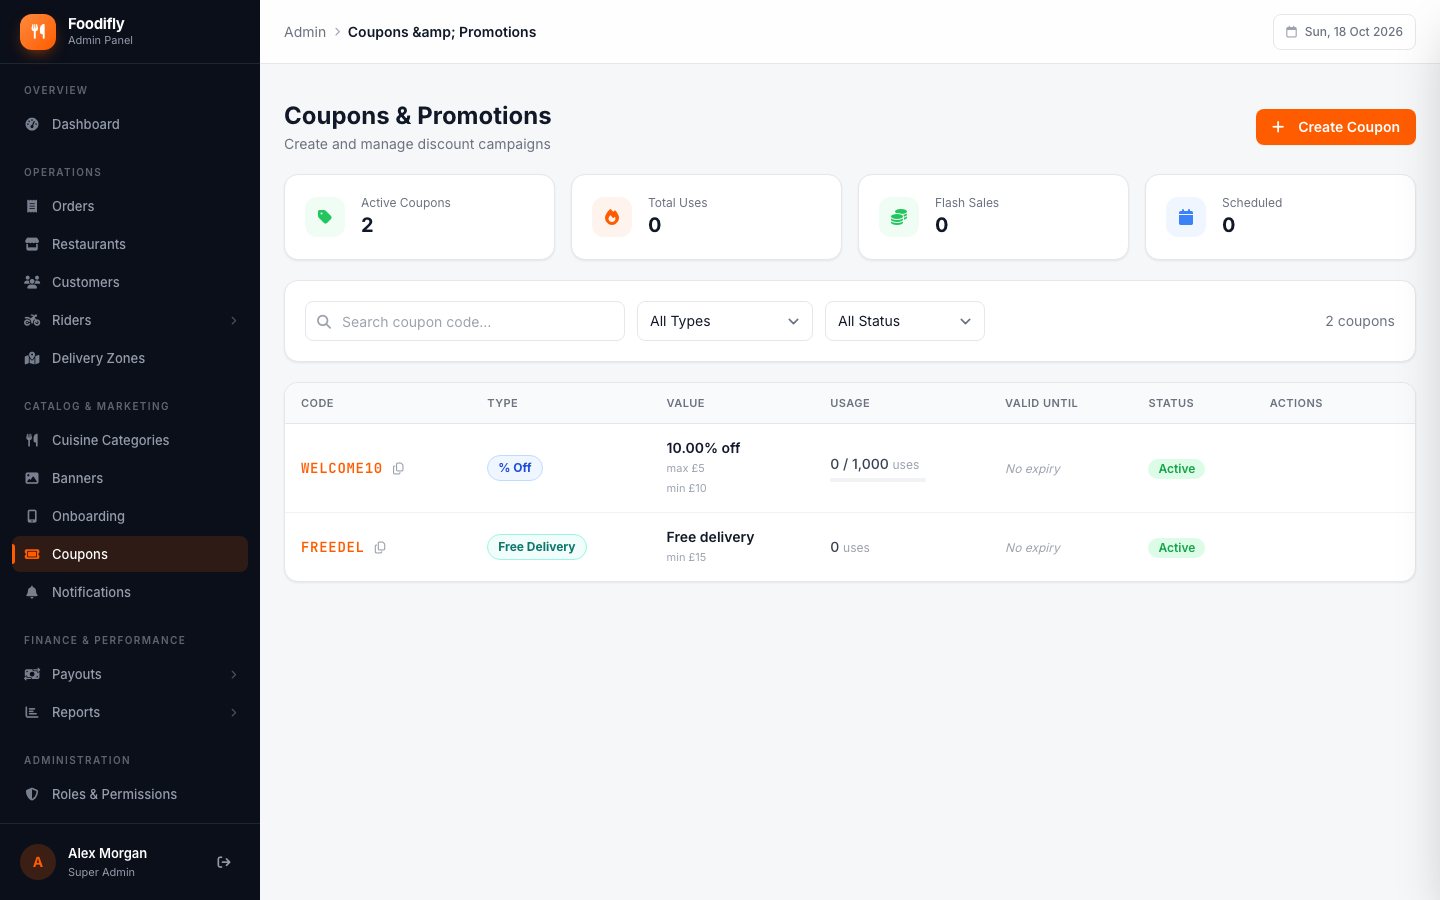
| Coupons | Percentage, fixed-amount and free-delivery codes, with usage limits and expiry; generate many at once. |
| Banners | The promotional banners on the home screens; drag to reorder. A banner can have a start and an end time: it is shown only between them. Both times are in the timezone set in Settings → General (the platform timezone), not your browser's or the customer's. |
| Onboarding | The intro slides shown when the customer and rider apps are first opened. |
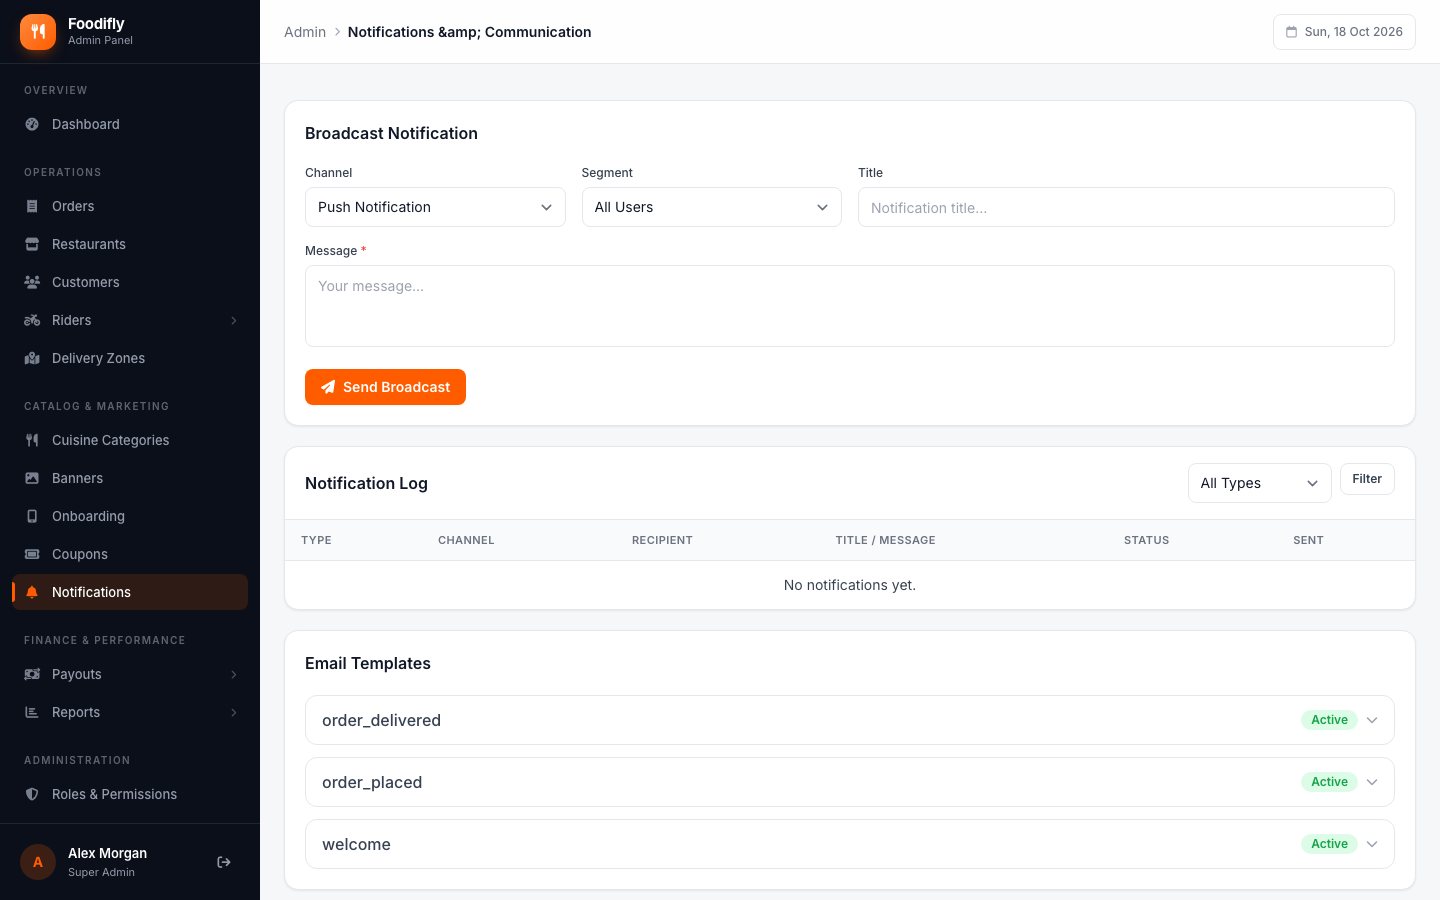
| Notifications | Send a push or email broadcast, edit the email templates, and see the log. |
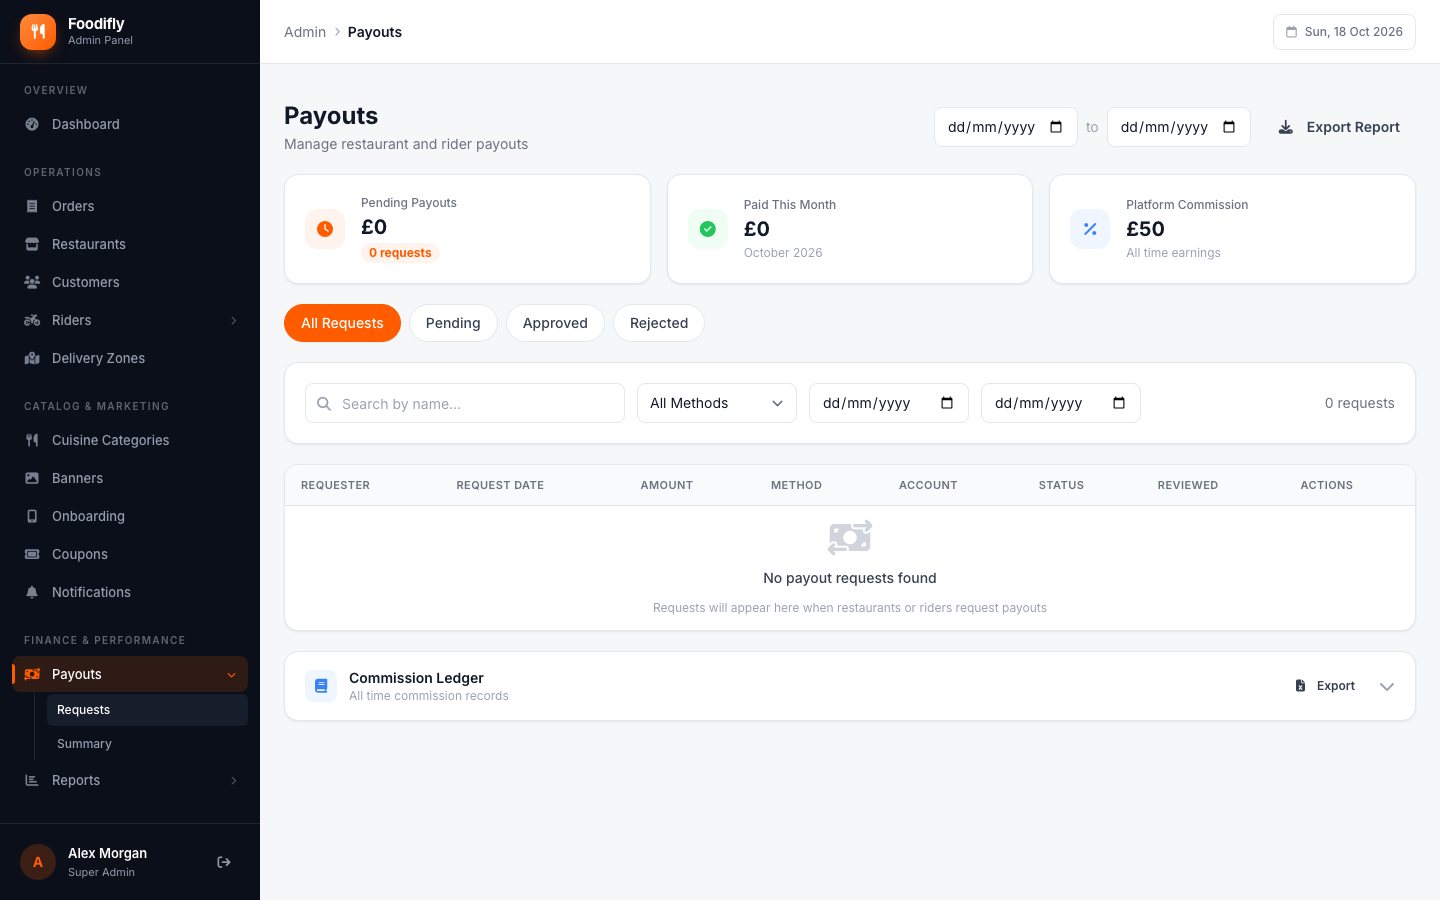
| Payouts | Payout requests from riders and restaurants: approve, reject, mark complete, and export. |
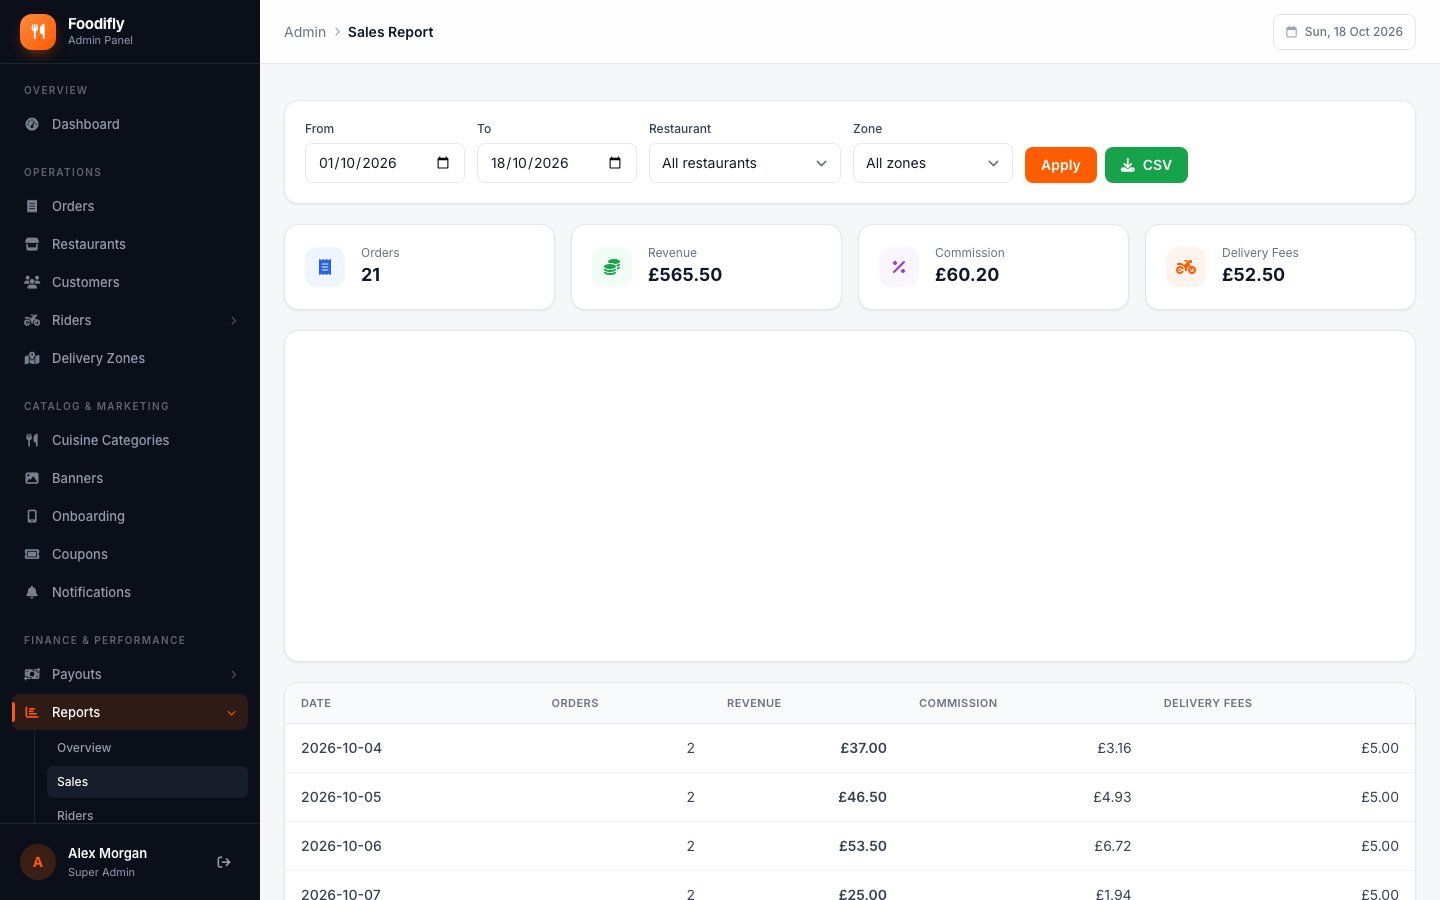
| Reports | Sales, commission, riders and customers reports for a date range (business days in your timezone), with export. |
| Staff & Roles | Create staff accounts and decide what each role can do. |
| Settings | Everything platform-wide. See the next section. |
Settings reference
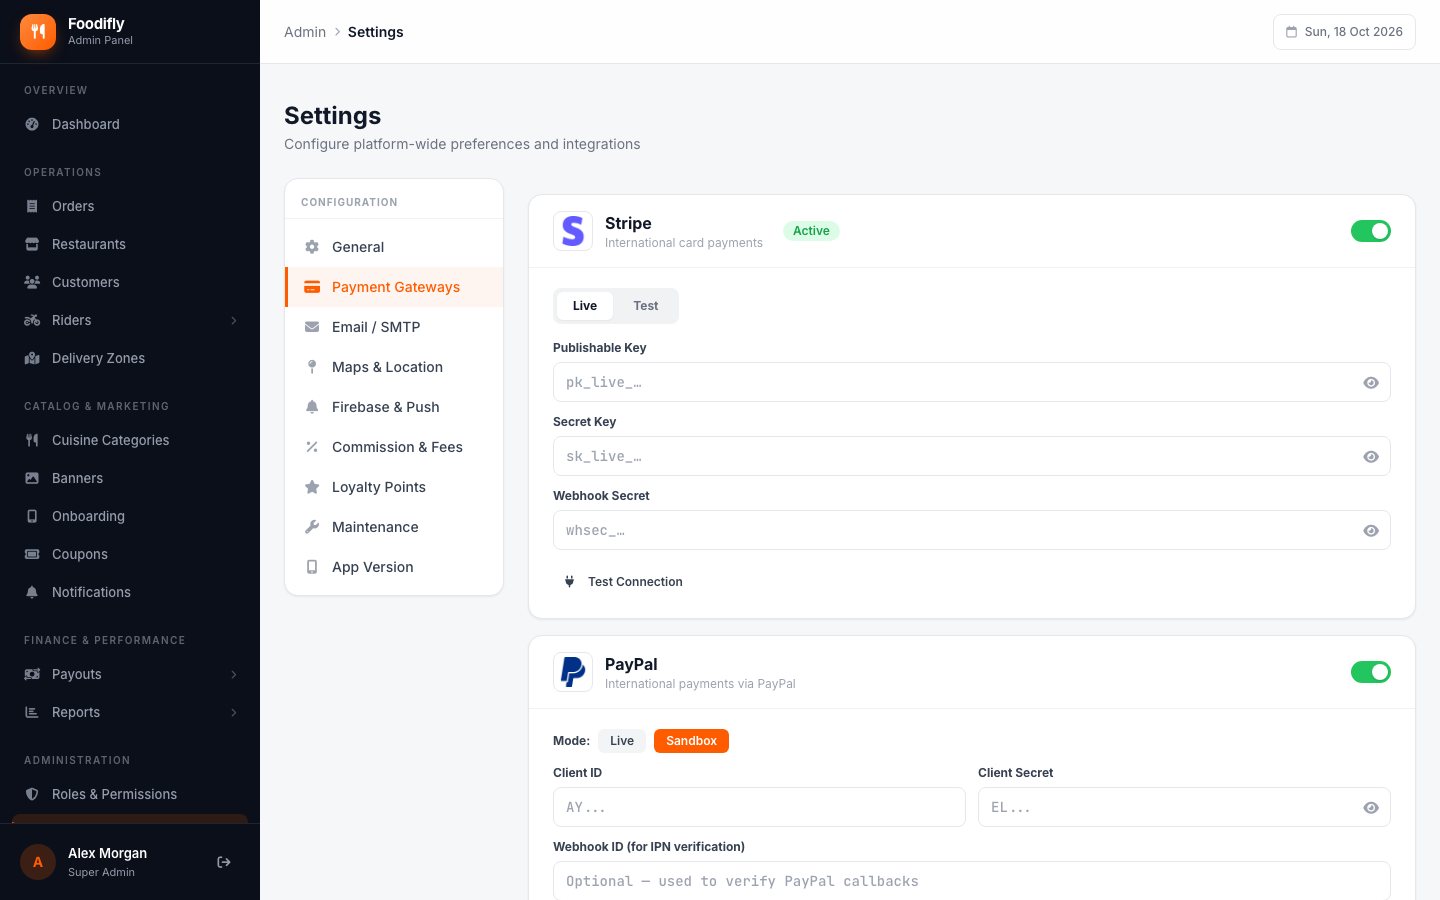
Admin → Settings has nine tabs. Changes apply to the website, the portal and the mobile apps without rebuilding anything.
| Tab | What it controls |
|---|---|
| General | App name, tagline, logo; support email, phone and hours; registered company name and address; Governing Law / Jurisdiction (named in the website's Terms of Service); currency symbol and code; default timezone; the "under…" filter steps on the website; minimum payouts for riders and restaurants; wallet top-up minimum, maximum and quick amounts; rider tip quick amounts; rider payout methods; how many seconds a rider has to accept an offer; whether a delivery needs the customer's code, how many wrong codes are allowed and the lock time; whether the website header shows "Become a Partner" after sign-in. |
| Payment Gateways | Keys and switches for every payment gateway and cash on delivery. See Payment gateways. |
| Email / SMTP | Mail driver, host, port, encryption, credentials, the From address and name, and the Restaurant Portal URL used in emails. Includes a test-email button. |
| Maps & Location | Google Maps key, default map center and zoom, and address search (Google Places) with an optional separate key. |
| Firebase & Push | Upload the Firebase service-account file, test the connection, and see whether the queue worker and scheduler are running. |
| Commission & Fees | Default commission for new restaurants, rider commission (share of the delivery fee), minimum delivery fee, maximum delivery distance, free-delivery threshold and minimum order (checked on the subtotal). |
| Loyalty Points | Points earned per unit of currency spent, the minimum to redeem, and points expiry in days. |
| Maintenance | Switch the apps into maintenance mode with a message and an optional end time. |
| App Version | Latest and minimum Android and iOS versions for the customer app and the rider app, and a Force update switch for each. |
Staff & roles
Admin access is controlled by roles. The installer creates your account as Super Admin (everything). Five roles are created for you:
| Role | Intended for |
|---|---|
| Super Admin | The owner. Full access, including roles and settings. |
| Admin Manager | Day-to-day operations. |
| Finance Manager | Payouts, commission and reports. |
| Support Agent | Orders, customers and notifications. |
| Content Manager | Banners, cuisines, onboarding and coupons. |
Open Roles to see and change exactly which permissions each role has, to create your own roles, and to assign them. Add team members under Staff; when you create an account you can tick must change password so the person chooses their own at first sign-in.
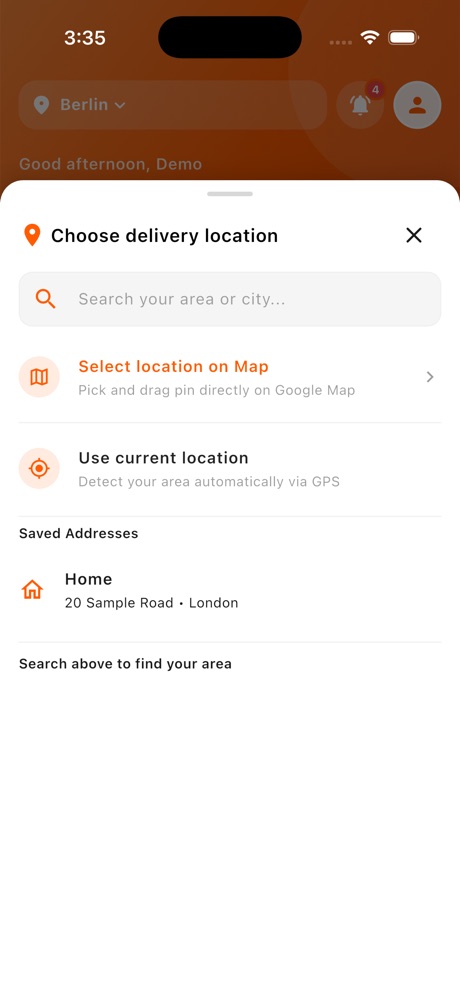
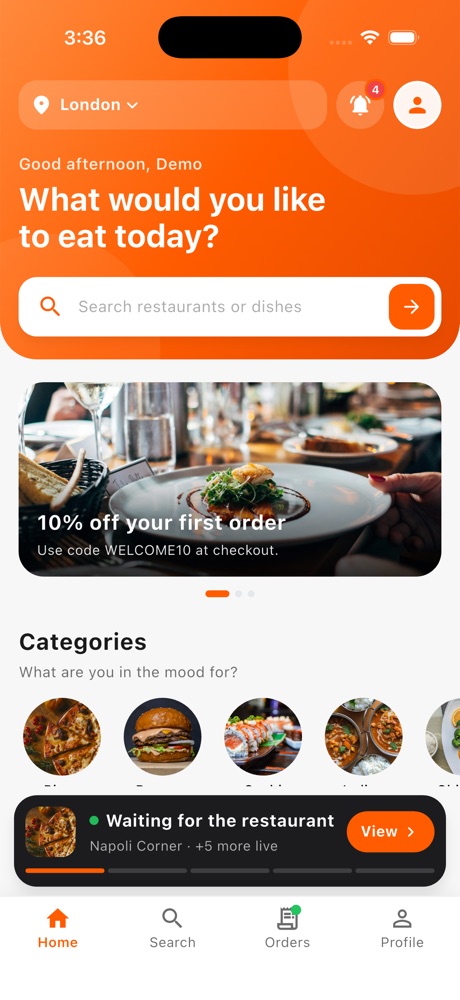
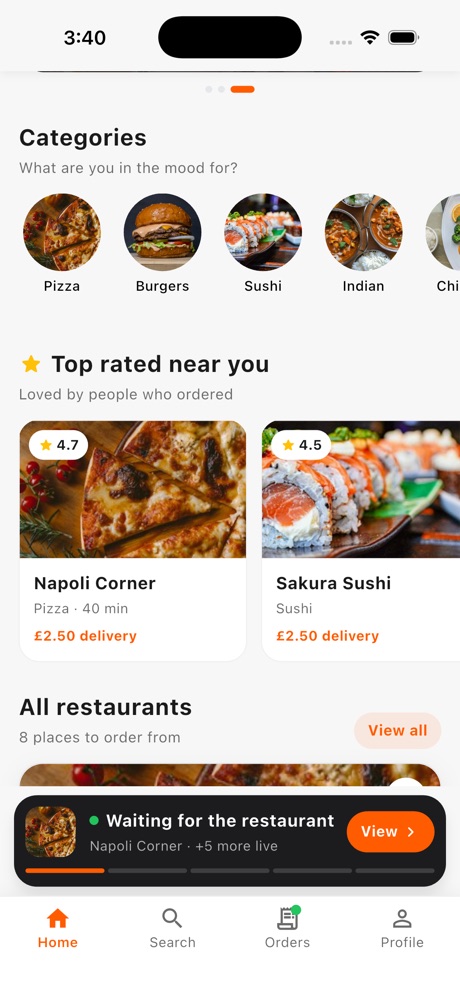
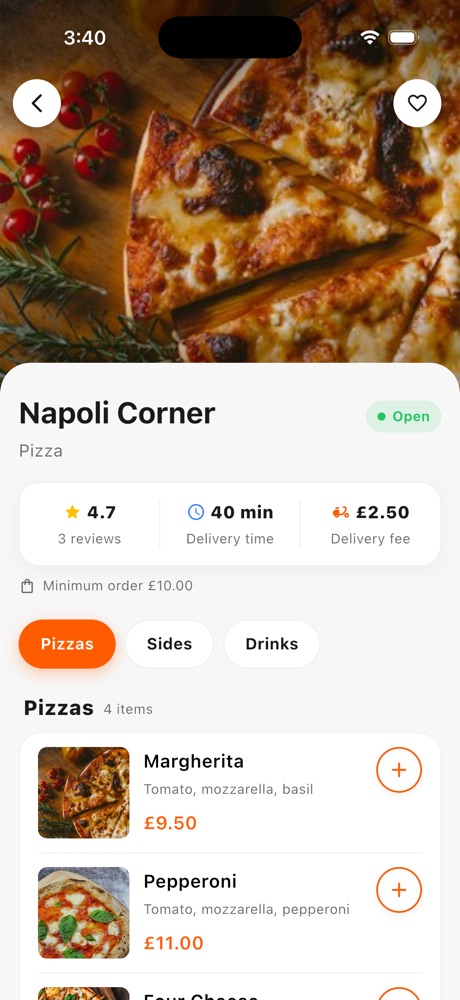
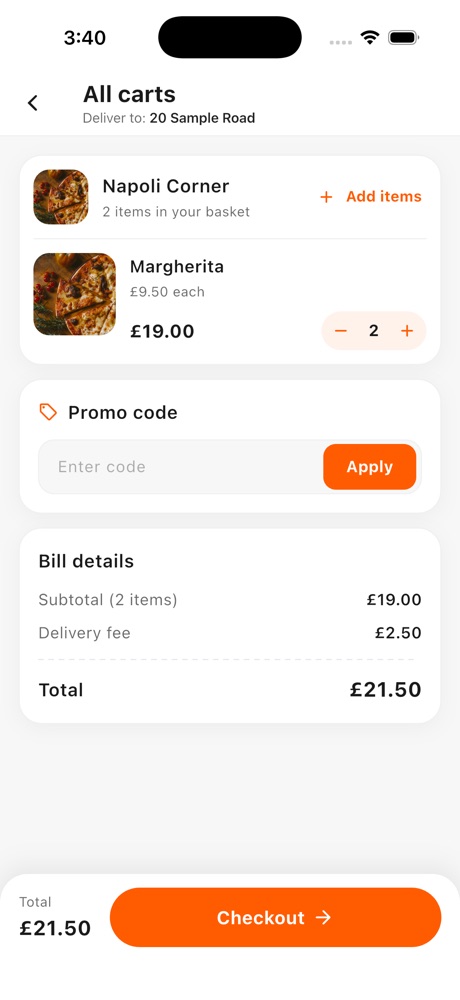
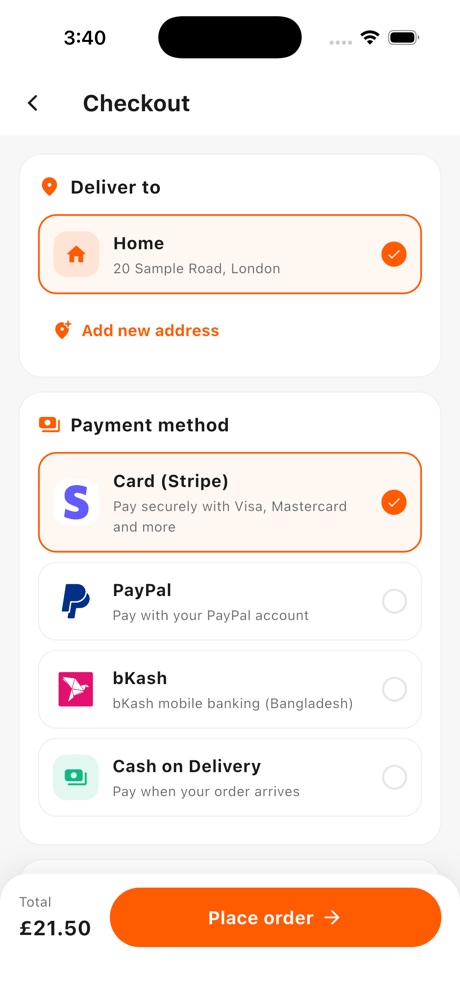
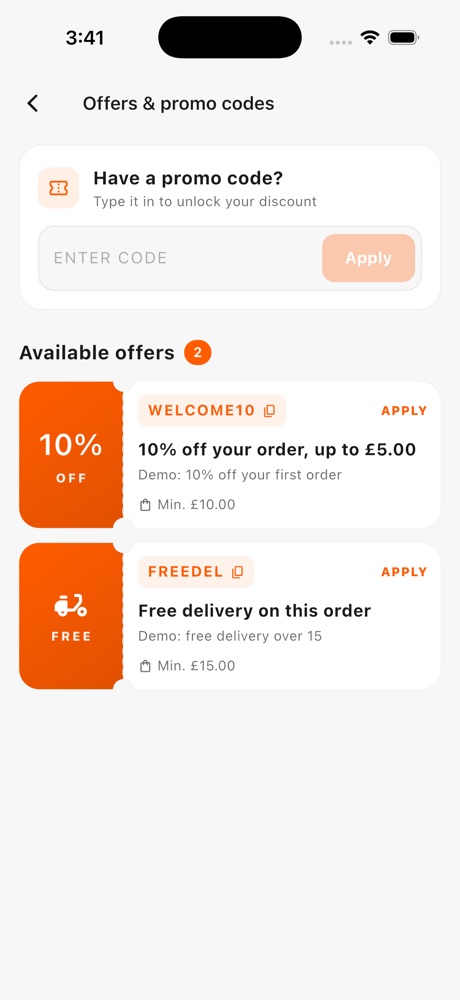
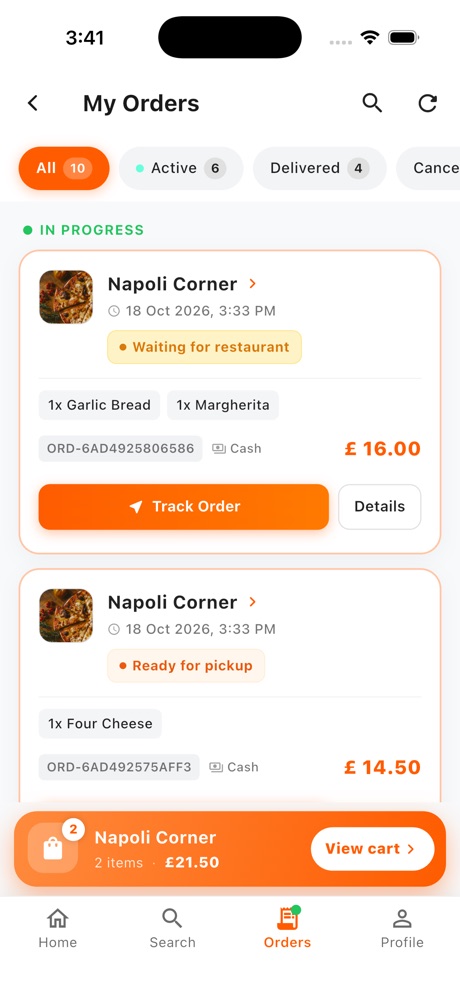
Customer app
Folder: customer-app.
1. Configure the API address
flutter pub get
cp assets/.env.example assets/.env
Open assets/.env (a required file that is not tracked in git) and set:
| Key | What to put |
|---|---|
API_BASE_URL | Required. Your API address exactly, e.g. https://your-domain.com/api/v1. On a phone on your Wi-Fi use your computer's LAN IP; for the Android emulator use http://10.0.2.2:8001/api/v1. To try the app against the live demo, use https://foodifly-admin.appiflybd.com/api/v1. |
GOOGLE_MAPS_API_KEY | Your Maps key for the address and map screens. |
PUSHER_APP_KEY, PUSHER_CLUSTER | Public Pusher key and cluster (the same values as the backend's PUSHER_APP_KEY and PUSHER_APP_CLUSTER). The app also reads them from the backend, so you can leave them blank. |
DISABLE_MAP_PICKER | true to develop without a Maps key. |
Card payments need no key in the app: the publishable key comes from the payment method you set up in the admin panel.
2. Firebase (push notifications)
The package contains the demo project's Firebase files. Replace them with your own: create a Firebase project, register the Android and iOS apps with your package name, then replace android/app/google-services.json and ios/Runner/GoogleService-Info.plist. Upload the project's service account in the admin panel (Push notifications). All the address, Pusher and Firebase steps in one place: Connect the apps.
3. Your own app id, name and icon
- Package name: change
applicationIdinandroid/app/build.gradle.ktsand the iOS bundle identifier in Xcode (Runner → Signing & Capabilities). If you also rename the Android code package (namespacein the same file), moveMainActivity.ktto match. Both must match the app you registered in Firebase. - App name:
android:labelinandroid/app/src/main/AndroidManifest.xmlandCFBundleDisplayNameinios/Runner/Info.plist. - Icon and splash: replace
assets/branding/app_icon.png, then rundart run flutter_launcher_iconsanddart run flutter_native_splash:create. - Maps key for the native maps: the same
GOOGLE_MAPS_API_KEYinassets/.envis read by the Flutter code and injected into the Android manifest and the iOS app at build time, so there is nothing to edit in the native files.
Before and after
Package name: android/app/build.gradle.kts, the iOS bundle identifier in Xcode, and the Kotlin package:
// before
namespace = "com.appifly.foodifly"
applicationId = "com.appifly.foodifly"
// after (your own id: lowercase letters, dots, no spaces)
namespace = "com.yourcompany.yourfood"
applicationId = "com.yourcompany.yourfood"
Then move android/app/src/main/kotlin/com/appifly/foodifly/MainActivity.kt to .../kotlin/com/yourcompany/yourfood/ and change its first line:
// before
package com.appifly.foodifly
// after
package com.yourcompany.yourfood
App name (shown under the icon): android/app/src/main/AndroidManifest.xml and ios/Runner/Info.plist:
<!-- before -->
android:label="Foodifly"
<key>CFBundleDisplayName</key><string>Foodifly</string>
<!-- after -->
android:label="Tasty Bites"
<key>CFBundleDisplayName</key><string>Tasty Bites</string>
API address (assets/.env, then build again):
# before
API_BASE_URL=
# after
API_BASE_URL=https://your-domain.com/api/v1
Google Maps key: only GOOGLE_MAPS_API_KEY=your-key in assets/.env. The rider and restaurant apps follow the same steps (their ids are com.appifly.deliveryman and com.appifly.foodifly_restaurant on Android, com.appifly.restaurant on iOS). Remember to register the new ids in Firebase (Connect the apps).
4. Run and release
flutter run                          # try it on a device or simulator
flutter build apk --release          # Android APK
flutter build appbundle --release    # Android, for Google Play
flutter build ipa # iOS, for the App StoreiOS simulator: build with signing enabled (a plain flutter run). An unsigned build has no keychain access, so secure storage fails and every request errors without reaching your server.
To make people update, raise the minimum version under Settings → App Version and turn on Force update.
Release signing
The download contains no signing keys or Apple team. Each app has to be signed with your own key before you publish it. Do this once per app (customer, rider, restaurant).
Android. 1. Create an upload keystore (Java's keytool comes with Android Studio). Run it inside the app's android/app folder and answer the questions:
keytool -genkey -v -keystore upload-keystore.jks -keyalg RSA -keysize 2048 -validity 10000 -alias upload2. Create android/key.properties (next to settings.gradle.kts) with the passwords you chose:
storePassword=your-keystore-password
keyPassword=your-key-password
keyAlias=upload
storeFile=upload-keystore.jks
storeFile is relative to android/app; an absolute path works too. android/app/build.gradle.kts reads this file for release builds. Without it, flutter build apk --release still works but signs with the debug key, which Google Play rejects.
3. Build with flutter build appbundle --release and upload the .aab to Google Play (turn on Play App Signing when asked).
Keep the .jks file and key.properties private and backed up. Do not commit them to a public repository. If you lose the upload key you have to ask Google to reset it before you can publish an update.
iOS (needs a Mac, Xcode and a paid Apple Developer account):
- Open
ios/Runner.xcworkspacein Xcode (runflutter pub getandcd ios && pod installfirst). - Select Runner → Signing & Capabilities, tick Automatically manage signing and choose your Team. No team is set in the download.
- Set your own Bundle Identifier and register it in App Store Connect and Firebase. Under Signing & Capabilities, keep Push Notifications and Background Modes → Remote notifications, and add your APNs key in the Firebase console.
- Run
flutter build ipa, then uploadbuild/ios/ipa/*.ipawith Xcode's Organizer or the Transporter app.
In-app updates on Android
On Android, the apps can install a new version from inside the app through Google Play's in-app update feature (the in_app_update package):
- Optional update: when you publish a newer build on Google Play, the app downloads it in the background and then shows an Update ready message with a Restart button. It never restarts by itself. It asks at most once a day, and not again for a version the person declined.
- Urgent update: in the Play Console, set the release's in-app update priority to 4 or 5 and the app uses Google's full-screen update instead.
- Forced update (customer and rider apps): when Force update is on and the installed version is below your minimum, the Update required button runs Google's full-screen update first and opens the store page only if that is not possible.
- Only for Google Play installs: it does nothing for a sideloaded APK or a debug build, and nothing breaks. To try it, upload two builds with different version codes to Play's internal testing track, install the older one from Play, then publish the newer one.
- iOS has no such feature: the apps keep opening the App Store page.
Rider app
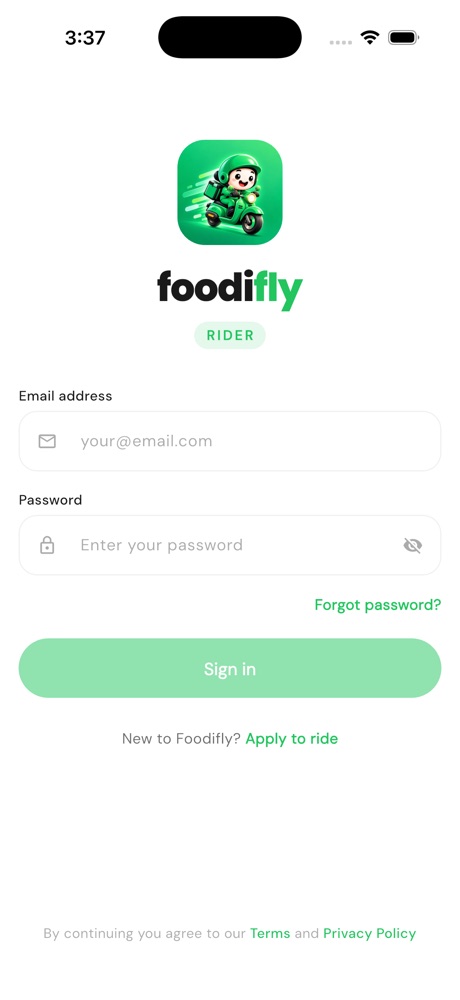
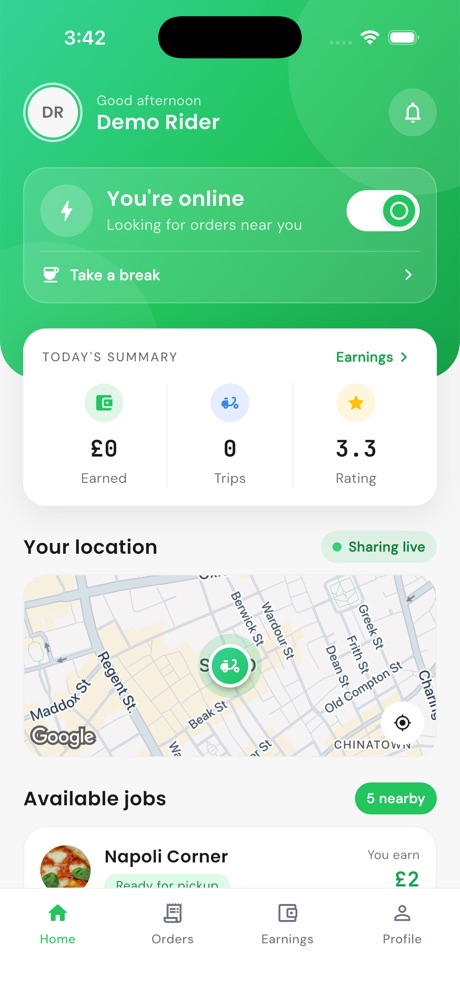
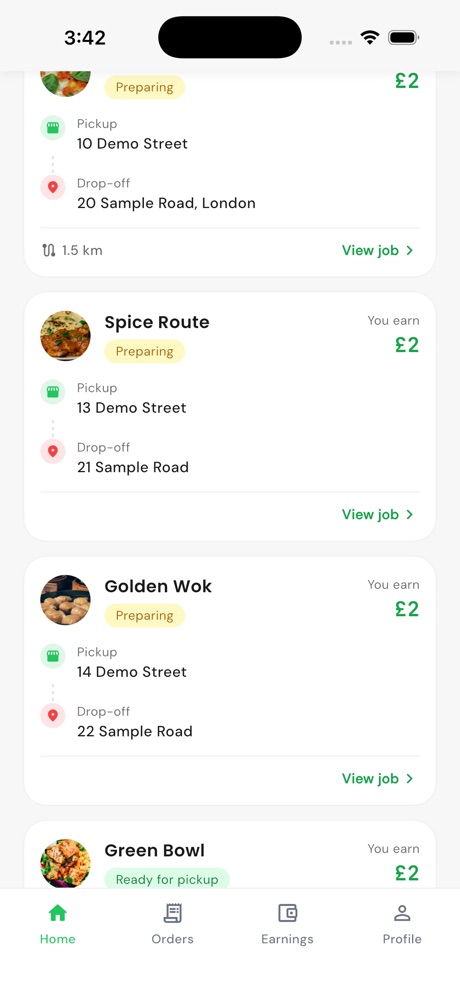
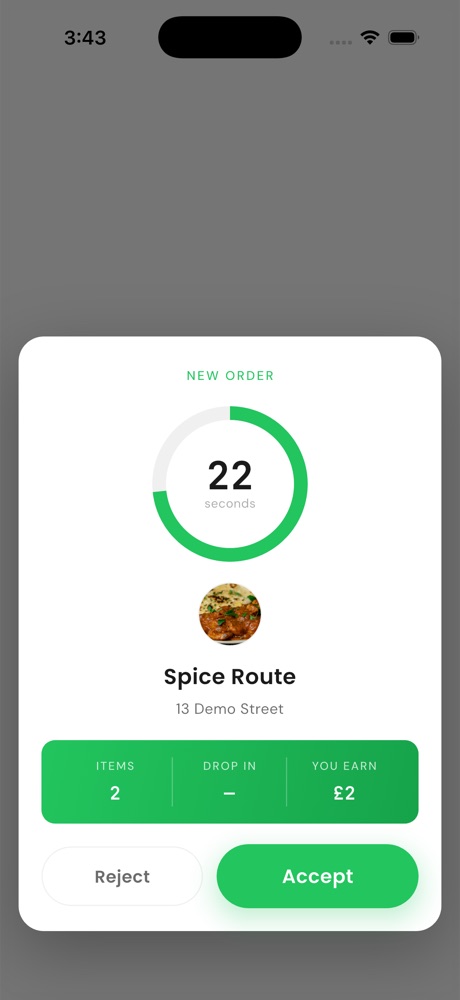
Folder: rider-app. Set up exactly like the customer app, with these differences:
flutter pub get
cp assets/.env.example assets/.env| Key | What to put |
|---|---|
API_BASE_URL | Required. Same address as the customer app. |
API_TIMEOUT | Optional request timeout in seconds (30 if left out). |
GOOGLE_MAPS_API_KEY | Your Maps key for the map and navigation screens. |
PUSHER_APP_KEY, PUSHER_CLUSTER | Optional: leave blank, the app reads them from the backend. |
- Firebase: replace
android/app/google-services.json,ios/Runner/GoogleService-Info.plistandlib/core/firebase/firebase_options.dartwith your project's. (This app keeps its Firebase options in a Dart file too; the easiest way to regenerate it isflutterfire configure.) - Package name:
applicationIdinandroid/app/build.gradle.ktsand the iOS bundle identifier; app label inAndroidManifest.xmlandInfo.plist. - Riders: a rider registers in the app with documents, then waits for approval under Admin → Riders. Only approved, online riders receive job offers. The rider app uses location while a rider is online; review the permission wording for your store listing.
Restaurant app
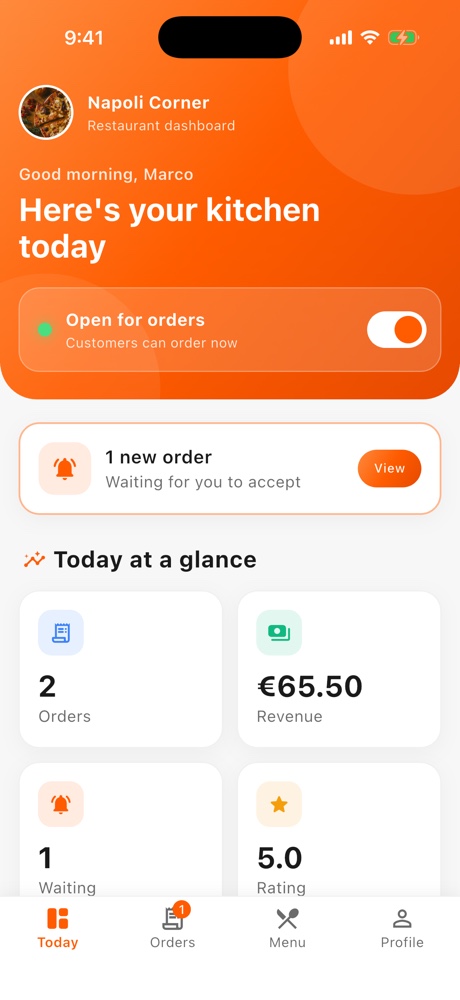
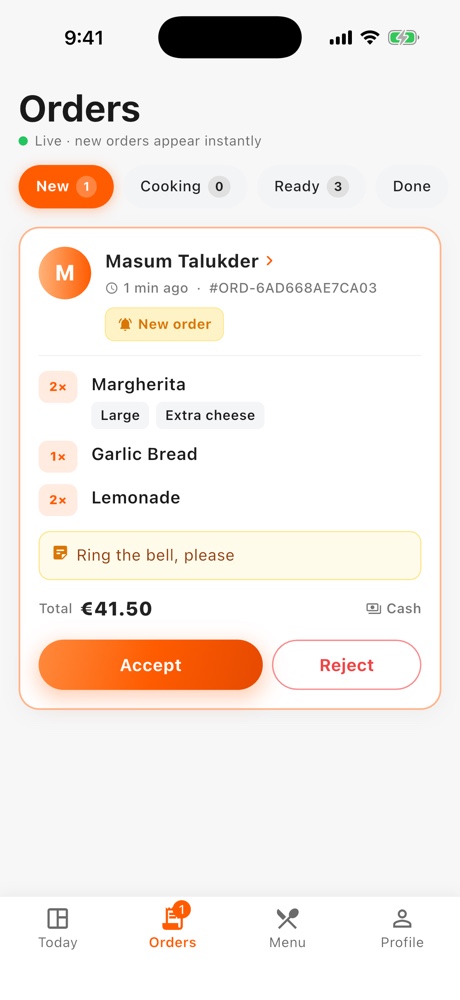
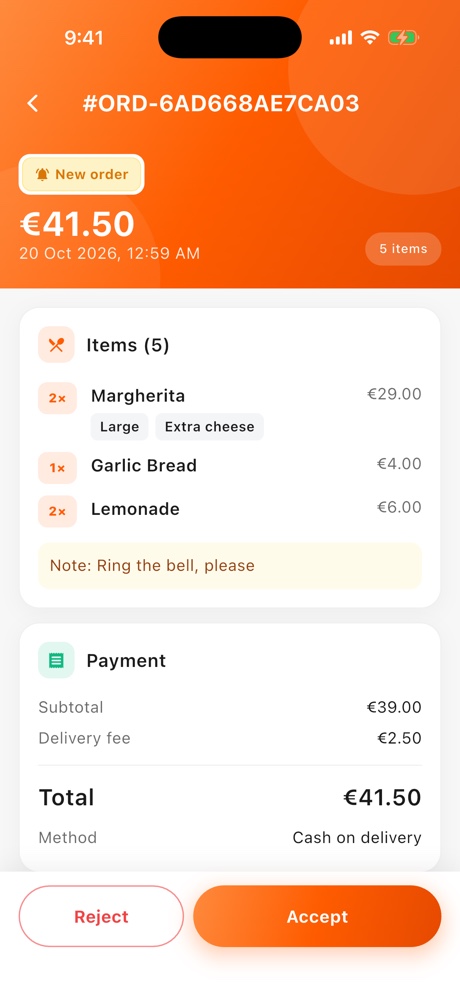
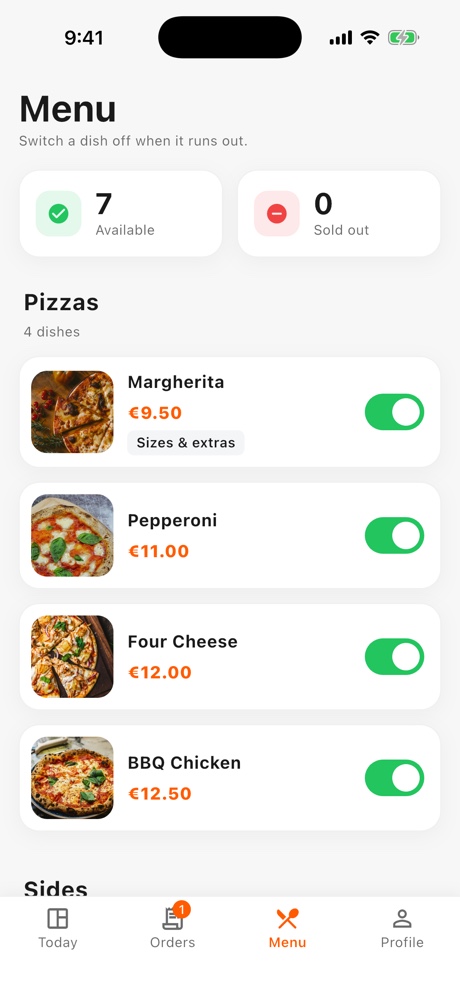
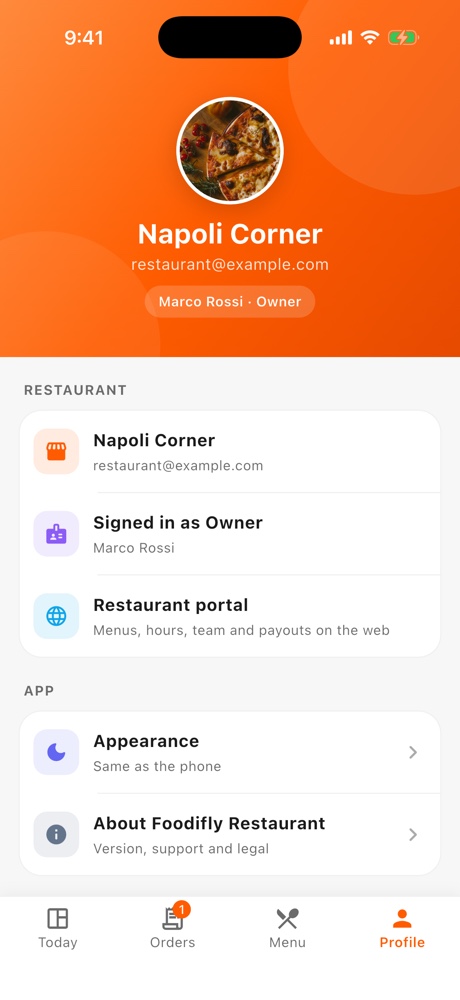
Folder: restaurant-app. The kitchen on a phone or tablet: owners and staff take live orders without a computer. They sign in with the same accounts they use on the restaurant portal, and each staff role keeps its permissions. Menus, opening hours, team accounts and payouts are managed in the portal.
1. Configure the API address
flutter pub get
cp assets/.env.example assets/.env| Key | What to put |
|---|---|
API_BASE_URL | Required. Same address as the customer app, e.g. https://your-domain.com/api/v1. |
That is the only setting. Pusher, the currency, the app name and the Terms and Privacy links all come from the backend.
2. Live orders and push notifications
- Live board (Pusher): nothing to set in the app. Once Pusher is set on the backend, new orders and status changes appear instantly with a sound alert and the header shows Live. Without Pusher the board refreshes every 15 seconds.
- Push (Firebase): new orders reach the owner's phone and the phone of every active staff member who can see orders, even when the app is closed. Replace
android/app/google-services.json,ios/Runner/GoogleService-Info.plistandlib/core/firebase/firebase_options.dartwith your project's (flutterfire configurewrites all three). Iffirebase_options.dartis left empty the app simply runs without push. - iOS: the Push Notifications capability is already set up (
ios/Runner/Runner.entitlements). Upload an APNs key in Firebase, and test push on a real iPhone; the simulator does not receive a device token.
3. Your own app id, name and icon
- Package name:
applicationIdinandroid/app/build.gradle.kts(demo:com.appifly.foodifly_restaurant) and the iOS bundle identifier in Xcode (demo:com.appifly.restaurant). iOS bundle ids cannot contain underscores. Both must match the apps you registered in Firebase. - App name:
android:labelinAndroidManifest.xmlandCFBundleDisplayNameinios/Runner/Info.plist. - Icon and splash: replace the images in
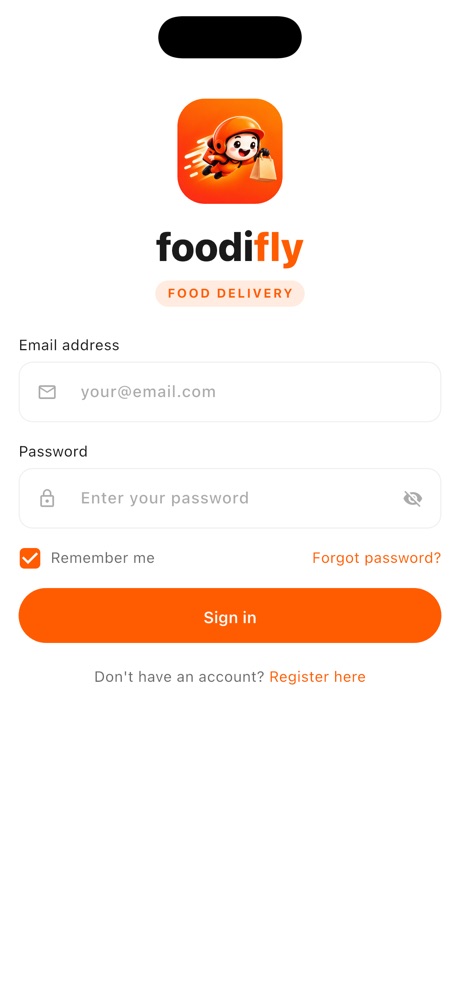
assets/branding/(app_icon.png,app_icon_foreground.png,splash_icon.png), then rundart run flutter_launcher_iconsanddart run flutter_native_splash:create. The logo on the sign-in screen isassets/images/app_icon.png. - Colors:
lib/core/constants/app_colors.dart(main color:primaryOrange), shared with the customer app's design.
4. Run and release
flutter run
flutter build apk --release          # Android APK
flutter build appbundle --release    # Android, for Google Play
flutter build ipa                    # iOS, for the App Store
Sign in with a restaurant owner account, or a staff account the owner created under Team in the portal. The restaurant must be approved under Admin → Restaurants first.
Restaurant portal
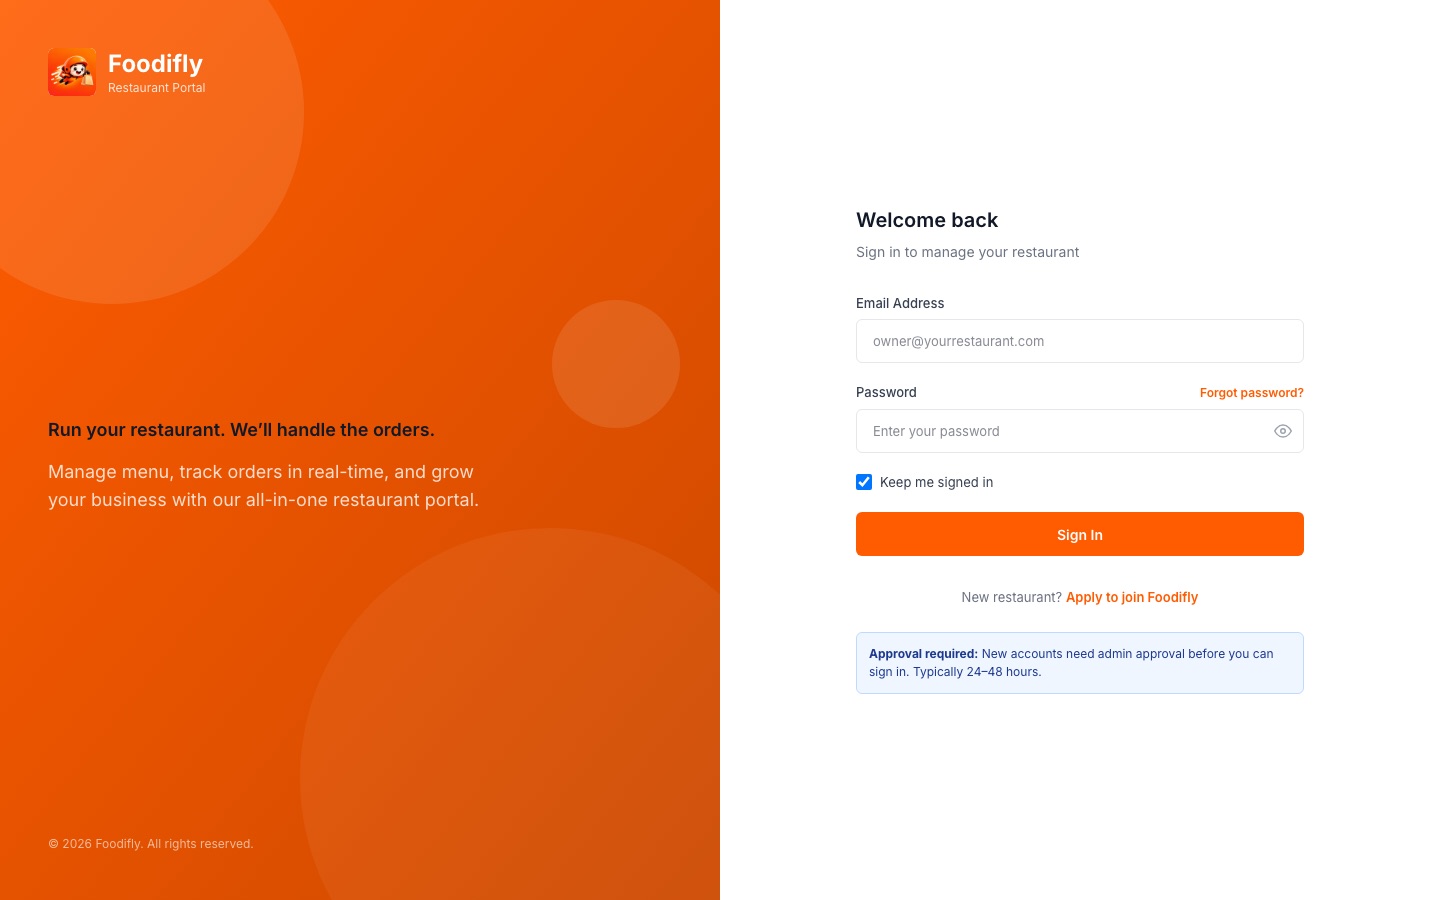
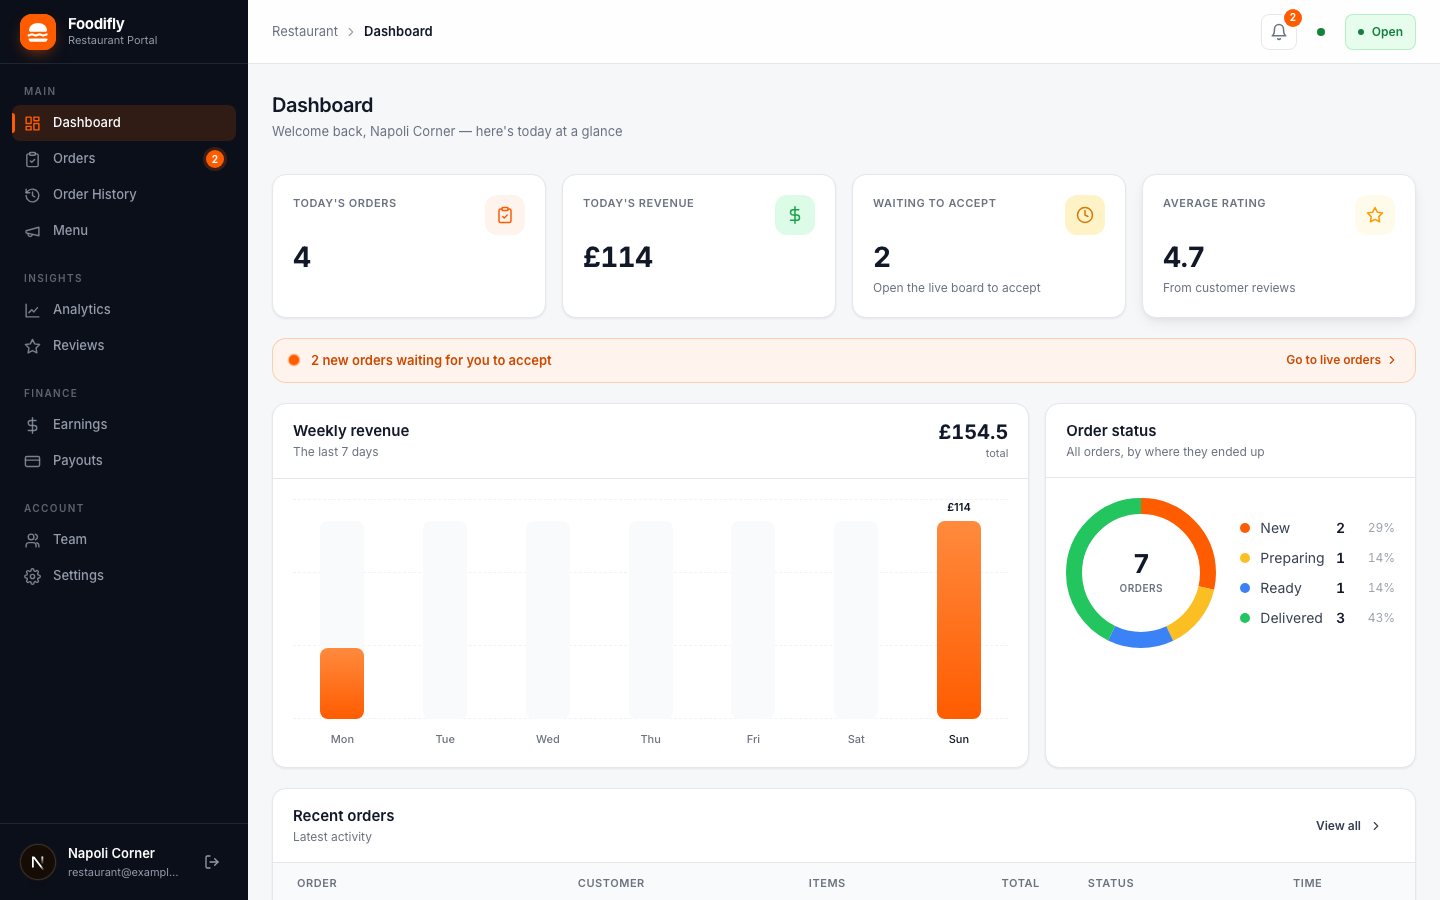
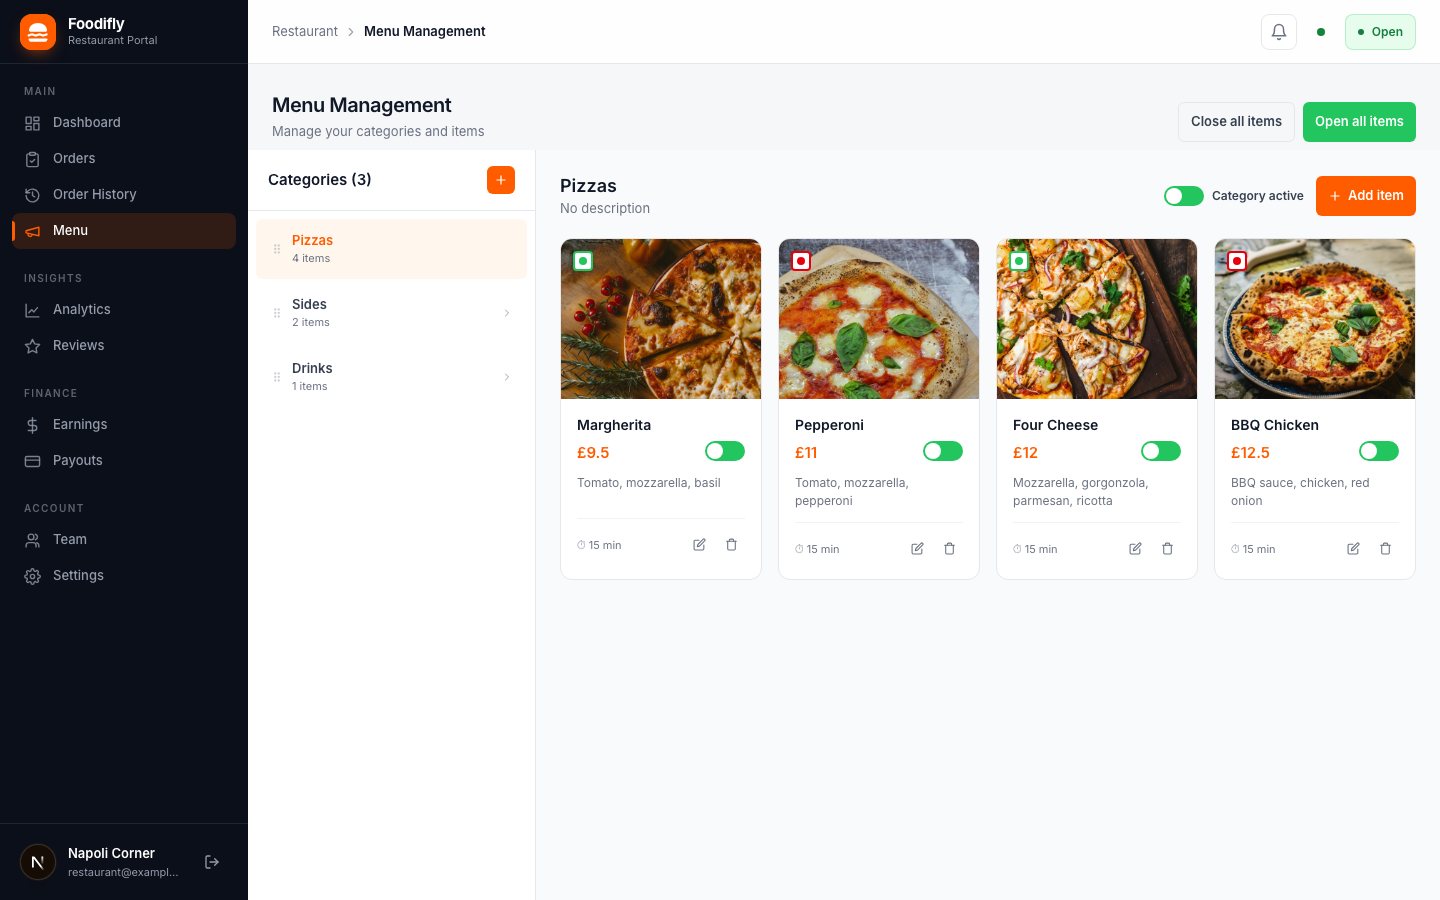
Folder: restaurant-portal. This is how restaurant owners and their staff run their whole restaurant from a browser. For taking live orders on a phone or tablet they can also use the restaurant app.
- Configure. Copy
.env.exampleto.env.localand setNEXT_PUBLIC_API_URLto your API (e.g.https://your-domain.com/api/v1). The Pusher keys are optional (read from the backend);NEXT_PUBLIC_TIMEZONEis only a fallback, as the portal uses the timezone you set in the admin panel. - Install and run:
npm ci npm run dev -- --port 3001 # development - For production: build and serve it behind HTTPS (for example Nginx proxying to Node). It listens on port 3336:
PM2 comes with the portal (npm run build npm run pm2:start # keeps it running with PM2 (or: npm start)npm run pm2:logs,pm2:restart,pm2:stop). To use another port, setPORTin.env.localfor PM2.NEXT_PUBLIC_API_URLis fixed when you build, so runnpm run buildagain after changing it. - Allow it on the backend. In the backend
.envadd the portal's address toCORS_ALLOWED_ORIGINSand setFRONTEND_URL; set the Restaurant Portal URL under Settings → Email / SMTP so emails link to it.
Sizes and extras (dish options)
Open a dish (Menu → Edit) and use Options → Add group. A group is a question for the customer, such as Size or Extras:
- Required means the customer must choose before adding the dish. Leave it off for optional extras.
- Allow multiple turns the group from pick-one (sizes) into pick-any (extras).
- Each choice has a name and an extra price added to the dish's price (0 for none).
Customers see the choices in the app and on the website, the total updates as they pick, and the order shows the chosen options to the restaurant, rider and admin. The server prices every order from the restaurant's own list, so a customer cannot change a price. A dish can have up to 10 groups.
How restaurants join
- A restaurant applies on the portal's Register page.
- You review and approve it under Admin → Restaurants.
- The owner signs in, builds the menu, sets opening hours and holidays, and invites staff (manager and kitchen roles) from Team. The live order board plays an alert for new orders.
The portal shows the logo and app name you set in the admin panel, and displays money and times in your currency and timezone.
Customer website
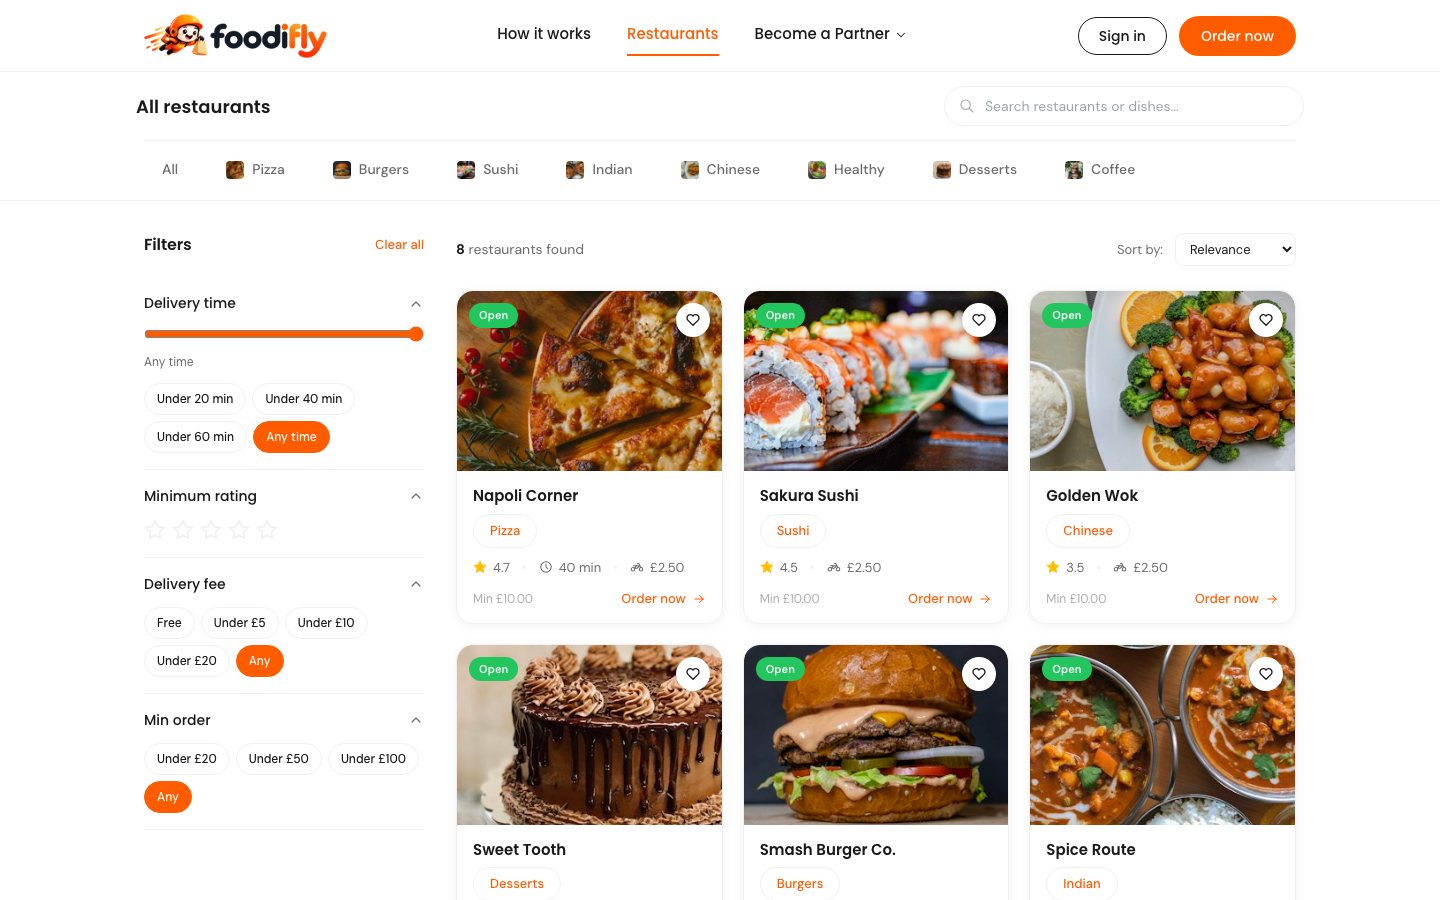
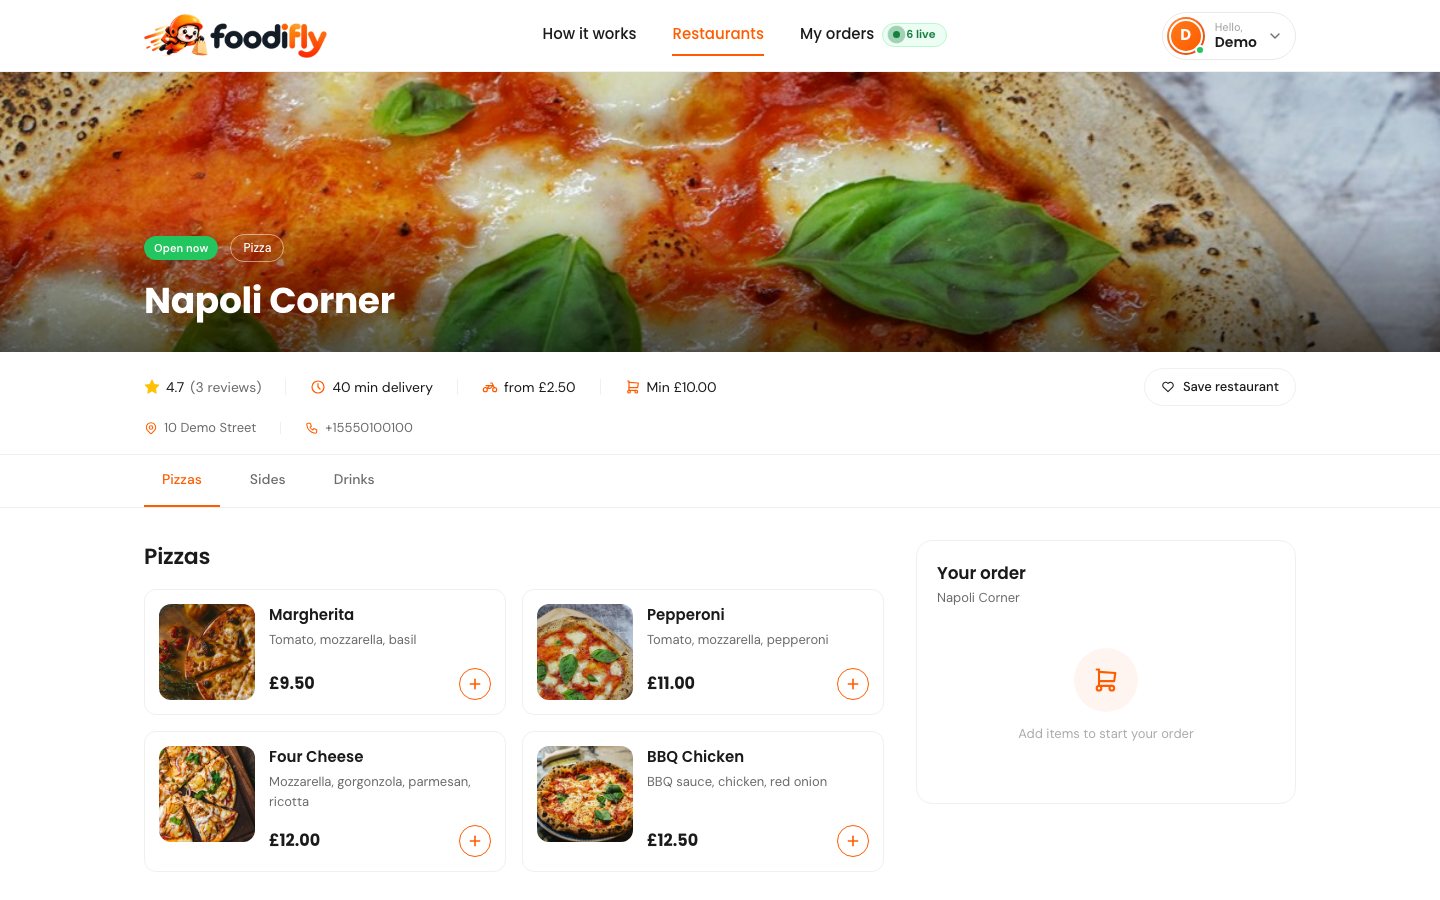
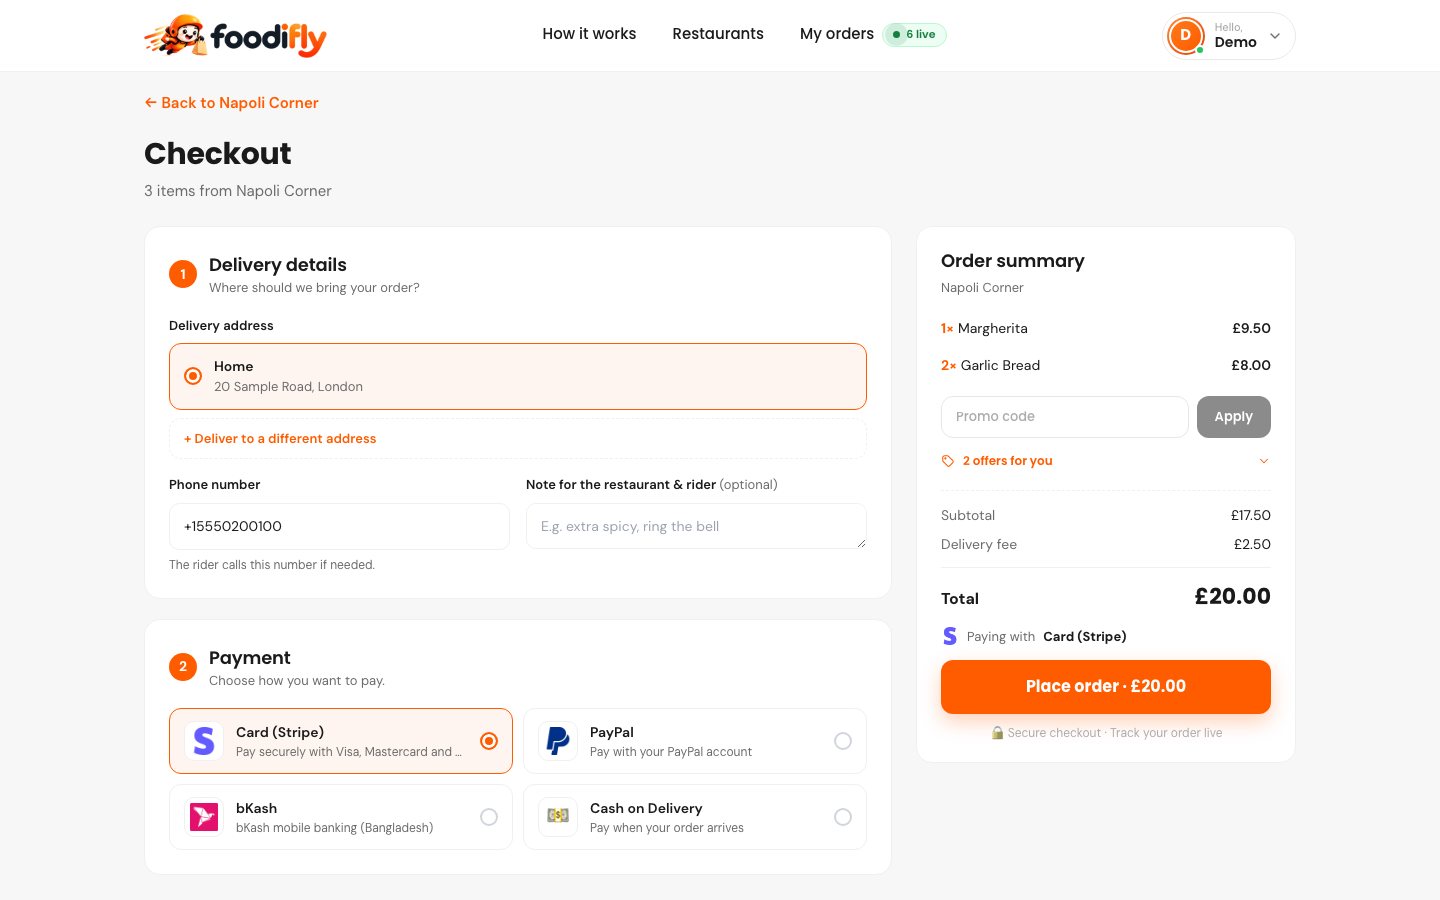
Folder: customer-website. The website lets customers browse, order, track and manage their account from a browser.
- Point it at your API, in one of two ways:
- In
.env(recommended when you run it with Node): copy.env.exampleto.envand setNEXT_PUBLIC_API_URL=https://your-domain.com/api/v1. The site then serves its settings from that value. - In
public/config.js(also works on static hosting): set your domain and remove the//at the start of both lines:
This file is read when the page loads, so no rebuild is needed.window.__FOODIFLY_API_HOST = 'your-domain.com'; // no http://, no /api/v1 window.__FOODIFLY_API_PROTOCOL = 'https';
- In
- Install and run:
npm ci npm run dev -- --port 3002 # development - Production:
npm run build
npm run pm2:start                 # keeps it running with PM2 on port 3002 (or: npm start)
npm run buildfirst pre-compiles the site's pages and switches to React's production build, so visitors' browsers do no compiling. Edit the.jsxfiles inpublic/as usual; development (npm run dev) uses them directly. Serve it behind HTTPS and add its address toCORS_ALLOWED_ORIGINSin the backend.env. - Set your details in the admin panel (Settings → General): the footer shows your support contacts, and the Terms of Service and Privacy pages use your company name, address, support contacts and governing law from there. Until the governing law is set, the Terms refer to the operator's own country without naming one.
The Terms, Privacy and Cookie pages are a draft that describes how the platform works. Have a lawyer review them for your country before launch; the pages carry a "pending legal review" banner until you remove it (LEGAL_REVIEW_PENDING in public/legal-pages.jsx).
Connect the apps
Four things tie your backend to the apps and websites. This page is the one place that lists them all. Do them in this order, after the backend is installed.
What goes where
| You need | Where you get it | Where it goes |
|---|---|---|
| API address | Your own domain: https://your-domain.com/api/v1 | Customer app, rider app, restaurant app, restaurant portal, website (one line each, below) |
| Pusher keys | dashboard.pusher.com | The backend .env only. The apps and websites fetch the public key from the backend by themselves |
| Firebase service-account JSON | Firebase console → Project settings → Service accounts | The admin panel: Settings → Firebase & Push |
Firebase app files (google-services.json, GoogleService-Info.plist) | Firebase console → Project settings → Your apps | Inside each Flutter app's folder |
1. The API address (base URL)
The API address is your backend's APP_URL plus /api/v1. If the admin panel opens at https://food.example.com, the API address is https://food.example.com/api/v1. Test it: open https://food.example.com/api/v1/app-config in a browser. You should see text starting with {.
| Part | File | Line to set | Needs a rebuild? |
|---|---|---|---|
| Customer app | customer-app/assets/.env | API_BASE_URL=https://food.example.com/api/v1 | Yes: build the app again |
| Rider app | rider-app/assets/.env | API_BASE_URL=https://food.example.com/api/v1 | Yes: build the app again |
| Restaurant app | restaurant-app/assets/.env | API_BASE_URL=https://food.example.com/api/v1 | Yes: build the app again |
| Restaurant portal | restaurant-portal/.env.local | NEXT_PUBLIC_API_URL=https://food.example.com/api/v1 | Yes: run npm run build again |
| Customer website | customer-website/.envor customer-website/public/config.js | NEXT_PUBLIC_API_URL=https://food.example.com/api/v1or window.__FOODIFLY_API_HOST = 'food.example.com';window.__FOODIFLY_API_PROTOCOL = 'https'; | .env: build and restart. config.js: no, just save the file |
- The three Flutter files start as
.env.example: copy it toassets/.envfirst. Never put a trailing slash after/api/v1. - In
config.jsthe website wants the domain only: nohttps://and no/api/v1. Add:8001-style ports only for a test server. Inconfig.jsremove the two//at the start of the lines you set. - Use
https. Phones block plainhttpaddresses in release builds. - Testing on a phone or emulator:
localhoston the phone is the phone itself. Use your computer's Wi-Fi address (for examplehttp://192.168.1.20:8001/api/v1), orhttp://10.0.2.2:8001/api/v1for the Android emulator. Android allows plainhttponly for the hosts listed inandroid/app/src/main/res/xml/network_security_config.xml(localhost and the emulator), so add your computer's Wi-Fi address there as another<domain>while testing. Live builds should usehttps.
Let the browser apps talk to the backend
The portal and website run in a browser, so the backend must allow them. In the backend .env set:
FRONTEND_URL=https://www.example.com
CORS_ALLOWED_ORIGINS=https://www.example.com,https://portal.example.com
Use the exact addresses people type, separated by commas, with no trailing slash. Then run php artisan optimize. Mobile apps do not need this.
2. Pusher (live tracking and new-order alerts)
- Sign in at dashboard.pusher.com → Channels → Create app. Pick the cluster nearest your customers. Open App Keys and copy
app_id,key,secretandcluster. - Put them in the backend
.env:
Then runBROADCAST_CONNECTION=pusher PUSHER_APP_ID=1234567 PUSHER_APP_KEY=your-key PUSHER_APP_SECRET=your-secret PUSHER_APP_CLUSTER=euphp artisan optimize. The secret stays on the server and is never put in an app. - That is all. The customer app, rider app, restaurant app, portal and website read the public key and cluster from
/api/v1/app-config. ThePUSHER_APP_KEYlines in the customer and rider.envfiles andNEXT_PUBLIC_PUSHER_KEYin the portal are optional; leave them blank, or, if you fill them, they must equal the backend values. - Check it: open
/api/v1/app-configin a browser and look for"realtime". If it holds your key and cluster, Pusher is on. If it saysnull, the key, id or secret is missing, orBROADCAST_CONNECTIONis notpusher, or you did not runphp artisan optimize.
Use hosted Pusher for the mobile apps: the Flutter plugin cannot connect to a self-hosted server. Without Pusher everything still works, but order status and the rider's position only update when the screen is refreshed.
3. Push notifications (Firebase JSON files)
Firebase uses two different kinds of file. People mix them up, so keep them apart:
| File | It is for | Where it goes |
|---|---|---|
| Service-account key a .json with "private_key" inside; name like myproject-firebase-adminsdk-xxxx.json | The backend, so it can send pushes | Upload it in the admin panel: Settings → Firebase & Push. Never put it in an app or in a public folder |
google-services.json | The Android app | android/app/google-services.json in each Flutter app |
GoogleService-Info.plist | The iOS app | ios/Runner/GoogleService-Info.plist in each Flutter app |
firebase_options.dart | Rider app and restaurant app (they also set Firebase up in code) | lib/core/firebase/firebase_options.dart. Regenerate it with flutterfire configure, or copy the values from your Firebase project |
- In the Firebase console create one project. Add an Android app and an iOS app for each of the three Flutter apps (customer, rider and restaurant), using the package name and bundle id you chose for each (
applicationId/ bundle identifier, see Customer app). They must match exactly. - For each app, download
google-services.jsonandGoogleService-Info.plistand replace the demo files at the paths in the table. The rider and restaurant apps also need a newfirebase_options.dart. - Open Project settings → Service accounts → Generate new private key to download the service-account
.json. - In the admin panel go to Settings → Firebase & Push. In Step 1 upload that file. In Step 2 press Test connection. You want Server key uploaded and Google accepts the key to show as OK.
- The same page shows Queue worker and Scheduler (cron). Both must be OK: pushes are sent from the queue. See After installing.
- iOS only: in Firebase → Project settings → Cloud Messaging, upload an APNs authentication key from your Apple developer account. Without it iPhones receive nothing, while Android works.
- Build the apps again so they pick up the new files.
The package contains the demo project's Firebase files so the apps compile. Pushes will not reach your customers until you replace them with your own and rebuild.
Check that everything is connected
/api/v1/app-configopens in a browser and shows your currency.- You can sign in to each app and the website against your server (not the demo one).
- Place a test order. The restaurant portal and the restaurant app ring and show it within a second or two: Pusher works.
- Change the order status in the admin panel. The customer's phone shows a notification: Firebase works.
If something does not work
| Symptom | Likely cause |
|---|---|
| The app says it cannot connect, or shows an error on the first screen | Wrong API_BASE_URL, a trailing slash, http instead of https, or you did not rebuild the app after editing .env |
| The website or portal shows a network or CORS error in the browser console | Its address is missing from CORS_ALLOWED_ORIGINS, or you did not run php artisan optimize |
The website still calls :8001 | Neither NEXT_PUBLIC_API_URL in .env nor the two lines in public/config.js are set, or the browser cached the old file (hard refresh) |
| The portal still uses the old address | NEXT_PUBLIC_* values are fixed at build time: run npm run build again and restart |
| Orders do not update live | realtime is null in /app-config (see step 2), or the Pusher cluster is wrong |
| Test connection fails | You uploaded google-services.json instead of the service-account key, or the Firebase Cloud Messaging API is disabled for the project |
| Test connection is OK but no push arrives | The queue worker is not running, the app still has the demo Firebase files, the bundle id does not match, or (iPhone) the APNs key is missing |
Environment (.env)
The installer writes the backend's .env file for you. You can edit it afterwards; after any change run php artisan optimize (the configuration is cached). Put values containing spaces or # in double quotes. The defaults below are those of .env.example.
| Key | Accepted values | Default | What it does |
|---|---|---|---|
APP_NAME | Text | Foodifly | Site name used in emails and the installer (the admin panel name and logo are set in Settings → General). |
APP_URL | Full address, no trailing slash | http://localhost | The backend's own address. The API address is this plus /api/v1. |
FRONTEND_URL | Full address | empty | Where the customer website runs (used in links and CORS). |
APP_ENV | local, production | local | Use production on a live site. |
APP_DEBUG | true, false | true | Must be false in production: it hides error details from visitors. |
APP_KEY | Generated | empty | Encryption key, created by the installer. Never change it on a live site. |
DB_CONNECTION | mysql | mysql | Database driver (MySQL or MariaDB). |
DB_HOST, DB_PORT | Host name, port | 127.0.0.1, 3306 | Where the database runs. |
DB_DATABASE, DB_USERNAME, DB_PASSWORD | Text | foodifly_admin, root, empty | Your empty database and its user. |
QUEUE_CONNECTION | database, redis, sync | database | Where background jobs wait (pushes, emails). database needs no extra software; use redis on a busy site (phpredis extension). |
CACHE_STORE, SESSION_DRIVER | database, file, redis | database | Cache and login sessions. |
SESSION_LIFETIME | Minutes | 120 | How long an admin stays signed in when idle. |
BROADCAST_CONNECTION | log, pusher, reverb | log | log = no live updates. Use pusher for live tracking and alerts, see Realtime. |
PUSHER_APP_ID, PUSHER_APP_KEY, PUSHER_APP_SECRET | From your Pusher app | empty | All three are required for live updates. The secret stays on the server. |
PUSHER_APP_CLUSTER | Pusher cluster code, e.g. eu, ap2 | ap2 | The cluster you picked when creating the Pusher app. |
FIREBASE_PROJECT_ID | Your Firebase project id | foodifly-test | Your Firebase project (the service-account file is uploaded in the admin panel). |
GOOGLE_MAPS_KEY | Maps API key | empty | Server-side Maps key. The value in Settings → Maps & Location takes precedence. |
MAIL_MAILER | smtp, log | log | log writes emails to the log instead of sending them. Use smtp live. |
MAIL_HOST, MAIL_PORT, MAIL_USERNAME, MAIL_PASSWORD | Your SMTP details | 127.0.0.1, 2525, empty | SMTP server. Can also be set in Settings → Email / SMTP. |
MAIL_FROM_ADDRESS, MAIL_FROM_NAME | Email, text | hello@example.com, ${APP_NAME} | The sender of every email. |
CORS_ALLOWED_ORIGINS | Comma-separated addresses, no trailing slash | only FRONTEND_URL | The website and portal addresses allowed to call the API from a browser. With APP_ENV=local, the usual localhost ports are allowed as well; to test from another device, add its address here. |
ADMIN_EMAIL, ADMIN_PASSWORD | Email, password | admin@foodifly.com, empty | The first Super Admin when you seed from the command line. The web installer asks for these itself. |
INSTALL_CURRENCY_CODE, INSTALL_CURRENCY_SYMBOL, INSTALL_TIMEZONE | e.g. EUR, €, Europe/Paris | written by the installer | Used once for the first seed. Change them later in Settings → General. |
SEED_DEMO_DATA | true, false | false | Loads sample restaurants and orders. Keep false on a live server. |
SEED_DEMO_IMAGES | true, false | true | Downloads demo photos when demo data is loaded. |
DEMO_MODE | true, false | false | Turns the site into a read-only public preview. See Demo mode. |
DEMO_ADMIN_EMAIL, DEMO_ADMIN_PASSWORD | Email, password | empty | Only with DEMO_MODE=true: the admin account the demo sign-in page offers. |
LOG_LEVEL | debug, info, warning, error | debug | How much goes into storage/logs. Use warning in production. |
Payment gateways
Switch gateways on under Admin → Settings → Payment Gateways. Only enabled methods appear to customers. Cash on delivery and the customer wallet need no keys.
Fees are not included in the purchase price. Stripe, PayPal, Razorpay, Flutterwave, Paystack, Mercado Pago, Paymob, SSLCommerz, bKash and senangPay charge their own transaction fees, set by the provider and paid by you to the provider. The same applies to Pusher Channels (see Realtime).
Card gateways charge in your platform currency (Settings → General). Check that your gateway account supports it. bKash operates in Bangladeshi taka only, and regional gateways (SSLCommerz, senangPay, Paystack, Paymob, Mercado Pago, Flutterwave) support only the currencies on your account; enable a gateway only if it can charge in your platform currency.
| Gateway | What you enter | Notes |
|---|---|---|
| Stripe (cards) | Publishable key, secret key, mode (test/live) | The app asks the server for the publishable key, so it is not stored in the app. No webhook is needed; the Webhook Secret field is not required. |
| PayPal | Client ID, client secret, mode; optional Webhook ID | Customers pay in the PayPal checkout page. |
| Razorpay (cards, UPI, wallets) | Key ID and key secret (rzp_test_… keys run in test mode) | India. Customers pay on a Razorpay payment page and return to /api/v1/payments/razorpay/callback. |
| bKash | App key, app secret, username, password, sandbox switch | Callback URL: https://your-domain.com/api/v1/payments/bkash/callback |
| SSLCommerz | Store ID, store password, sandbox/live | Bangladesh. Customer pays on SSLCommerz’s page and is returned to /api/v1/payments/sslcommerz/callback. |
| senangPay | Merchant ID, secret key, sandbox/live | Malaysia (MYR). Return URL: /api/v1/payments/senangpay/callback. |
| Paystack | Public key, secret key | Nigeria, Ghana, South Africa, Kenya. Set the callback URL to /api/v1/payments/paystack/callback in the Paystack dashboard. |
| Paymob | API address, API key, secret key, public key, integration IDs | Egypt, Pakistan, UAE, Saudi Arabia, Oman. Integration IDs are the payment methods you enabled in Paymob (comma separated). |
| Mercado Pago | Public key, access token | Latin America. A TEST- access token uses the sandbox. |
| Flutterwave | Public key, secret key | Africa (v3 API). Customers are returned to /api/v1/payments/flutterwave/callback. |
| Cash on delivery | Just the on/off switch | Riders record cash collected; you see it under Riders → Cash. |
The platform confirms card payments by checking with the gateway when the customer returns from it, and bKash and the redirect gateways (Razorpay, SSLCommerz, senangPay, Paystack, Paymob, Mercado Pago, Flutterwave) through their callback URLs above, always by asking the gateway again before an order is marked paid. You do not need to register a webhook URL for Stripe, PayPal or Razorpay.
Start in test / sandbox mode, place a test order through each gateway you enable, and only then switch to live keys. Secret keys are stored on your server and never sent to the apps.
Push notifications (Firebase)
- Create a project at console.firebase.google.com.
- Add an Android app and an iOS app for the customer app, the rider app and the restaurant app, using the package names and bundle ids you chose. Download
google-services.jsonandGoogleService-Info.plistinto each Flutter app (see Customer app and Rider app). - In Project settings → Service accounts, generate a private key (a
.jsonfile). - In the admin panel open Settings → Firebase & Push, upload that file and press Test connection.
- Make sure the queue worker is running: pushes are sent from the queue.
For iOS you also need an APNs key uploaded in Firebase (Project settings → Cloud Messaging).
External services and outbound connections
Foodifly contains no license check, no purchase-code verification and no usage reporting. It never sends anything to the author. The only outbound connections are the ones below; apart from OpenStreetMap, they go to services you set up, and only when you enable them:
| Service | Who connects | When | What is sent |
|---|---|---|---|
| Firebase Cloud Messaging | Your server | When a push notification is sent | The device token and the notification text, to Google |
| Pusher Channels | Your server and the apps/browsers | Live tracking and order alerts | Order status and rider position events |
| Google Maps, Places and Routes | Your server and the admin pages that show a map | Address search, delivery routes, the zone and rider maps | Addresses and coordinates, with your Maps key |
| Payment gateways (Stripe, PayPal, Razorpay, ...) | Your server and the customer's browser or app | Only for gateways you switch on | The order amount and payment references |
| OpenStreetMap (map tiles and Nominatim) | The visitor's browser, on the customer website | The live tracking map, and "use my location" on the home page | Map tile requests for the area shown, and the coordinates being turned into an address. The map shows the required "© OpenStreetMap contributors" credit. Heavy use needs your own tile provider; see the OpenStreetMap tile usage policy. |
| SMTP server | Your server | When an email is sent | The email |
| Unsplash | Your server | Once, when you load the optional demo data | Nothing; it downloads about 4 MB of free demo photos (turn off with SEED_DEMO_IMAGES=false) |
The admin panel, the installer, this documentation, the customer website and the mobile apps all carry their own scripts, icons and fonts (the admin ones are in public/assets and the built files). They work offline and send no visitor data to font or CDN hosts.
Your Terms and Privacy pages should name the services you enable. See Customer website for the legal-page notes.
Maps
- In the Google Cloud console, create an API key and enable Maps SDK for Android, Maps SDK for iOS and, for address search, Places API (New).
- Put the key in Settings → Maps & Location, and in each app's
assets/.envasGOOGLE_MAPS_API_KEY. - Set the default latitude, longitude and zoom to your city or country; the maps and the demo data start there.
- Restrict the key by application id (and SHA-1 on Android) in the Google Cloud console. It is readable in any shipped app.
Without a Maps key the map screens stay blank; the apps can still be developed with DISABLE_MAP_PICKER=true (customer app).
Delivery route on the tracking map
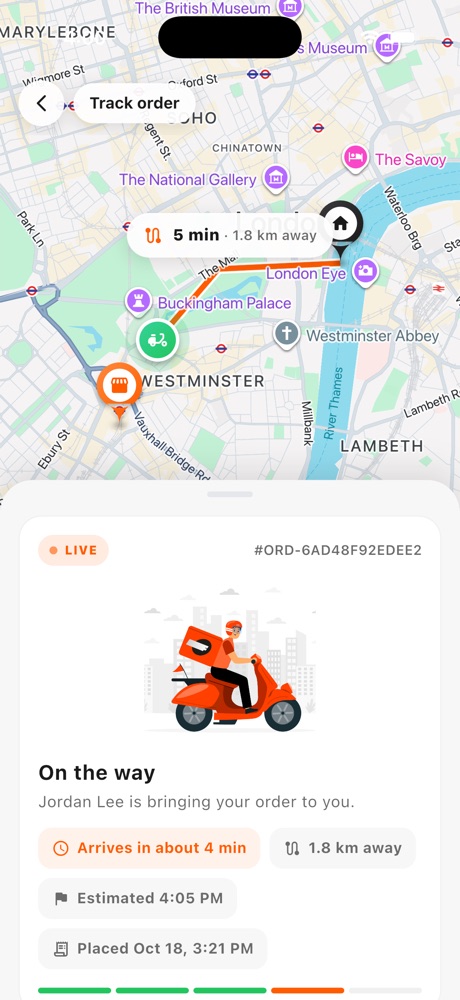
While an order is on its way, the customer's tracking map draws the road route from the rider to the door, with the distance and time left ("5 min · 1.8 km away"), and the arrival time follows it. Before pickup it shows the planned route from the restaurant.
- In the same Google Cloud project, enable the Routes API.
- Under Settings → Maps & Location, add a key in Places API Key (or leave it blank to use the Maps key above) and keep Delivery route on the tracking map set to On. This key is used only on your server and never sent to the apps, so restrict it to the Routes and Places APIs and to your server's IP address.
The apps ask your server, not Google, and the server reuses a route for 30 seconds to keep Google usage low. With the setting off, no key, or if Google refuses the request, customers still see an estimated distance and time (marked with “~”) but no line on the map.
Set your SMTP details under Settings → Email / SMTP (mail driver, host, port, encryption, username, password, From address and name) and use the test email button. Order, password-reset and notification emails are sent from the queue, so the worker must be running. The email templates can be edited under Notifications.
Email costs are yours. Foodifly sends email through the SMTP server you choose. You are responsible for any costs of your email service provider (for example sending limits, monthly plans or per-email fees), and for keeping your sending domain set up so emails are delivered. The purchase price does not include an email service.
Realtime (Pusher)
Live order tracking, new-order alerts for restaurants and job offers for riders use Pusher Channels.
Pusher is a paid-service dependency. It has a free plan with limits on connections and messages; a busy platform needs a paid plan. Its costs are set by Pusher, paid by you to Pusher, and are not covered by the purchase price.
- Create an app at dashboard.pusher.com and note its App ID, Key, Secret and Cluster.
- In the backend
.envsetBROADCAST_CONNECTION=pusherand the fourPUSHER_APP_*values (all of id, key and secret are required; with any missing the app falls back to thelogdriver and live updates are off). Runphp artisan optimize. - The website, the portal and the mobile apps read the key and cluster from the backend automatically. If you do set them in an app's
.env, they must match the backend's.
Hosted Pusher is needed for the mobile apps. A self-hosted Reverb server can serve the web portal, but the Flutter Pusher plugin can only connect to Pusher's hosted service. Channels used: private-order.{id}, private-rider.{id}, private-restaurant.{id}.
Customization
From the admin panel (no code)
- App name, tagline and logo, currency, timezone, support details, company details: Settings → General.
- Delivery fees, minimum order, commission, loyalty, tips, wallet limits and payout rules: Settings and Delivery Zones.
- Home banners, cuisines and the apps' intro slides: Banners, Cuisines, Onboarding.
Colors and branding in code
| Where | File |
|---|---|
| Customer app colors | customer-app/lib/core/constants/app_colors.dart (main color: primaryOrange) |
| Rider app colors | rider-app/lib/core/constants/app_colors.dart (main color: primaryGreen) |
| Restaurant app colors | restaurant-app/lib/core/constants/app_colors.dart (main color: primaryOrange) |
| Restaurant portal | restaurant-portal/tailwind.config.ts |
| Admin panel | backend-and-admin-panel/tailwind.config.js, then npm run build |
| Website colors and logos | customer-website/app/globals.css (CSS variables such as --primary) and the images in customer-website/public/brand/ |
The website, portal and apps are in English. See Known limitations.
Updating
- Back up your database and the
.envfile andstorage/folder. - Upload the new files over the old ones (keep your
.envandstorage/). - Run
bash scripts/deploy.sh. It checks the server, installs packages, builds the admin assets, runs migrations (the site is in maintenance only for that step), refreshes the caches, restarts the queue workers and reports whether the worker, scheduler, Firebase key and currency are set up. It never seeds data. - The mobile apps only need rebuilding if their own code changed. To make people update, raise the minimum version under Settings → App Version.
Versioning and updates policy
- Versions are numbered major.minor.patch (for example 1.2.3). A patch fixes bugs, a minor release adds features and stays compatible with your data, a major release may need changes and says so in its notes.
- Updates are free for every buyer on CodeCanyon: download the new version from your Downloads page. Each release lists what changed in the Changelog, including any database migrations.
- Database changes always ship as migrations, so an update never needs you to edit tables by hand. Back up first, then follow the steps above.
- If you changed the code yourself, keep your edits in a copy and compare them against the new version before overwriting files.
- When you publish a new mobile app build, raise the minimum under Settings → App Version and use Force update only after the new app is live in the stores.
Go-live checklist
APP_ENV=productionandAPP_DEBUG=false.- HTTPS on the API, the website and the portal.
- Demo data and demo accounts removed (
php artisan foodifly:demo-remove) and a strong Super Admin password set. - The queue worker and the cron scheduler are running (the Firebase & Push tab shows both).
- Gateways switched from test to live keys, and a real test order placed through each.
- Google Maps and Firebase API keys restricted to your app ids; your own Firebase files in every app.
CORS_ALLOWED_ORIGINSlists only your website and portal.- The web installer is locked (
storage/installed.lockexists). Never delete that file on a live site. - Database and
storage/backups scheduled. - Legal pages reviewed by a lawyer and your governing law set.
Troubleshooting
| Symptom | Fix |
|---|---|
| The installer shows a 404 | The domain must point at the public folder, and Apache needs mod_rewrite (Nginx needs the standard Laravel try_files rule). |
| Installer says "exec() is disabled" | Ask your host to enable it, or use the command-line install. |
Installer says admin assets (public/build) are missing | The download does not include them. Run npm ci && npm run build in the backend folder, or run it on your computer and upload public/build. |
Installer says vendor/ is missing | Run composer install --no-dev --optimize-autoloader in the backend folder, or run it on your computer and upload vendor/. |
| 500 error after install or update | Read storage/logs/laravel.log; then run php artisan optimize:clear. Check folder permissions on storage and bootstrap/cache. |
A .env change has no effect | Run php artisan optimize (the configuration is cached). |
| Admin panel has no styles | Run npm ci && npm run build in the backend folder (step 0), or upload public/build built on your computer. |
| Images or uploads do not show | Run php artisan storage:link and check APP_URL. |
| Pushes never arrive | Check the queue worker is running, upload the service account and press Test connection, and that the app has your own Firebase files. |
| No live updates (tracking, new-order alerts) | BROADCAST_CONNECTION=pusher with id, key, secret and cluster all set; then php artisan optimize. App and backend must use the same key and cluster. |
| Riders stay "online" for ever | The cron scheduler line is missing. |
| The app shows "Connection refused" or a network error | localhost on a phone is the phone. Use your server's address (or your computer's LAN IP while testing) in API_BASE_URL, and run a local backend with php artisan serve --host 0.0.0.0. |
| Every request fails on an iOS simulator | Build with signing (plain flutter run); an unsigned build cannot use the keychain. |
App build fails: assets/.env not found | cp assets/.env.example assets/.env in that app. |
| Map screens are blank | The Maps key is missing, wrong, or not enabled for that platform. |
| The website cannot reach the API | Set window.__FOODIFLY_API_HOST in public/index.html and add the site to CORS_ALLOWED_ORIGINS. |
| A restaurant cannot sign in to the portal | It has to be approved under Admin → Restaurants first. |
FAQ
Can I use it without the mobile apps?
Yes. The admin panel, the customer website and the restaurant portal work on their own. Riders do need the rider app.
Is there a restaurant mobile app?
Yes. The restaurant app handles live orders and dish availability on a phone or tablet. Menus, opening hours, team accounts and payouts are managed in the web portal.
Can I use more than one currency?
The platform has one currency, set in Settings → General (and chosen in the installer). All apps, gateways and reports use it.
Which gateways can I use in my country?
Stripe and PayPal depend on what your own gateway account supports. The other gateways are regional: Razorpay in India, bKash and SSLCommerz in Bangladesh, senangPay in Malaysia, Paystack and Flutterwave in Africa, Paymob in the Middle East and Pakistan, Mercado Pago in Latin America. Cash on delivery and the wallet work everywhere.
Does it send SMS?
No. Notifications go out as push and email. See Known limitations.
Can I translate it?
The interface is in English. Translation is not built in; the text is in the source files.
How do I add a delivery zone and fees?
Delivery Zones → Add zone, then open the zone's Fees to set the fee tiers by distance. Assign riders to a zone from their profile.
How do I give a restaurant a different commission?
Open the restaurant and set its commission rate or add commission rules; they override the platform defaults for that restaurant.
How do I update?
See Updating.
ℹ️ Known limitations
So you are not surprised, here is what version 1.0.0 does not include:
- No SMS. Notifications are delivered by push and email only; there is no SMS feature in this version.
- The restaurant app covers the kitchen only. Building menus, opening hours, team accounts, analytics and payouts are in the web portal.
- English only. There is no translation system; the apps, portal, website and admin panel are in English.
- One platform currency. No per-customer currency switching.
- Sign-in is by email and password. The backend has a Google sign-in endpoint, but none of the included apps or websites uses it.
- Mobile Pusher needs hosted Pusher. Self-hosted Reverb works for the web portal only.
- Regional gateways. bKash is Bangladesh-only; the other gateways work in the countries their provider supports. Test each in its sandbox before going live.
Support
Support is provided through the Envato comments & messaging system. Before contacting support, please:
- Read through this documentation fully
- Check the FAQ and Troubleshooting sections above
- Search existing comments on the CodeCanyon item page
What's included in support
- ✅ Answering questions about item features
- ✅ Fixing confirmed bugs reported by the buyer
- ✅ Assistance with item configuration
What's not included
- ❌ Custom feature development
- ❌ Installation service on your server
- ❌ Third-party service support (payment gateways, Firebase, Google Maps, Pusher, hosting)
- ❌ Assistance with items you have modified beyond the original source
Response time
Support responses are typically provided within 24–48 hours on business days.
Changelog
v1.0.0: Initial release
- Laravel 13 backend and admin panel with web installer, roles and permissions, reports, coupons, zones and commission rules.
- Customer, rider and restaurant Flutter apps (Android and iOS).
- Restaurant owner web portal and customer website (Next.js).
- Payments: Stripe, PayPal, Razorpay, bKash, SSLCommerz, senangPay, Paystack, Paymob, Mercado Pago, Flutterwave, cash on delivery and customer wallet.
- Live order tracking and alerts (Pusher), push notifications (Firebase), loyalty points and wallet.
Credits & licenses
Foodifly is built on open-source software. All of the libraries below allow commercial use and redistribution. Their licenses are included with each package in vendor/, node_modules/ and the Flutter package cache.
Backend and admin panel
| Package | License | Used for |
|---|---|---|
| Laravel Framework 13 | MIT | Backend framework |
| Laravel Sanctum | MIT | API authentication |
| Livewire | MIT | Interactive admin components |
| Spatie Laravel Permission | MIT | Roles and permissions |
| kreait/laravel-firebase | MIT | Push notifications (FCM) |
| Intervention Image | MIT | Image processing |
| barryvdh/laravel-dompdf | MIT | PDF invoices |
| L5-Swagger | MIT | API reference page |
Swagger UI 5.32.6 (bundled in public/api-docs/swagger-ui) | Apache-2.0 | API reference page |
| Pusher PHP Server | MIT | Realtime broadcasting |
| Tailwind CSS, Alpine.js, Vite, Axios | MIT | Admin panel styles and scripts |
Chart.js 4.4.3 (bundled in public/assets) | MIT | Admin charts |
Font Awesome Free 6.5.1 (bundled in public/assets/fontawesome) | Icons CC BY 4.0, fonts SIL OFL 1.1, code MIT | Admin icons |
Customer, rider and restaurant apps (Flutter)
| Package | License |
|---|---|
| Flutter | BSD-3-Clause |
| get, dio, pretty_dio_logger, equatable, lottie, geolocator, geocoding, pusher_channels_flutter, cached_network_image, smooth_page_indicator, permission_handler, logger, flutter_dotenv, in_app_update, cupertino_icons | MIT |
| firebase_core, firebase_messaging, google_maps_flutter, flutter_secure_storage, shared_preferences, url_launcher, webview_flutter, flutter_local_notifications, package_info_plus, intl, shimmer | BSD-3-Clause |
| image_picker | Apache-2.0 |
Poppins, DM Sans and JetBrains Mono fonts (bundled in each app's assets/fonts) | SIL Open Font License 1.1 |
The full list is in each app's pubspec.yaml; Flutter also shows every license inside the app via its license page.
Restaurant portal and customer website
| Package | License |
|---|---|
| Next.js 16, React 18/19, pusher-js, @babel/standalone | MIT |
| Tailwind CSS | MIT |
Fonts, maps and images
- Fonts (Inter, JetBrains Mono, Poppins, DM Sans): SIL Open Font License 1.1. Inter and JetBrains Mono are bundled with the admin panel and this documentation; the mobile apps and the website bundle their own font files.
- Google Maps, Firebase, Pusher, Stripe, PayPal, Razorpay, bKash, SSLCommerz, senangPay, Paystack, Paymob, Mercado Pago, Flutterwave are third-party services with their own terms; the names and logos belong to their owners.
- Demo photos are free images from Unsplash, downloaded by the demo seeder only. They are not part of the package and should be removed from a live site (
php artisan foodifly:demo-remove).